#linux kernel 5.8
Explore tagged Tumblr posts
Visit Tumblr Blog
Explore Tumblr blogs with no restrictions, modern design and the best experience.
Last Seen Tumblr Blogs


Fun Fact
Tumblr’s website traffic is steadily declining.
Text
Internet rebooted just when I finished that post... Scared me for a bit.
To be honest, transitional periods are always messy, even if you somehow preempt them.
Like... It turns out that you have to replace the battery in a phone every 18 to 24 months, but unless you have the proper tools or a repair shop is a available in the area, there's no way to just pop the thing open and put in a new one as they're basically sealed containers.
Most android phones have an 18 month support lifespan with Samsung's 5 year and Google's 7 year being the exception...
Sure, you can do some weird hacky stuff to install Windows 11 on an unsupported old laptop, but even Microsoft admits that is basically a ticking time bomb. Win 10 has only a little over a year left to live at this point as well... And the cost of extended support exceeds the cost of the machine.
Providing the thing doesn't start to come apart on its own before then. Old rubber seams tend to give way and crumble with age after all.
And there's even weirder forms of support lost... While Open Source drivers are technically forever, it just takes some very poor timing to make life miserable for years.
You see... This particular laptop is a dual GPU model... With an Intel HD 4600 running most of the time and an Nvidia GTX 950M that can take over if needed.
First, the Intel GPU is one hardware revision short of proper vulkan support, so running Proton for Windows gaming on Linux on it is... Some what questionable. It isn't what I'd call fast either.
The Nvidia GPU has full Vulkan support, but... You have two main issues... The drivers and getting applications to utilize the GPU when needed.
By default, they use the Noveau drivers, which does technically work, but runs like a car stuck on first gear... And I'm not sure if the switchover works at all. It will catch up eventually, but it could be years.
The proprietary GeForce drivers are fully functional, but unless something changes in later drivers, I'm stuck with the older Proprietary Kernel hooks... Which makes addressing the GPU more complicated than it should be. And while there are official Open Source Kernel hooks now, they only work for newer Nvidia GPUs.
The proprietary kernel hooks cause all sort of problems... Like it makes updating more complicated, the system isn't as fine tuned or integrated together as it should, and more. That also leads into the other annoyance... Optimus support.
As I can't address the secondary GPU directly, I have to use a supplied tool known as prime to get it to work... And as simple as Prime-run application-name might sound, it can be a hit or a miss.
Oh and I can't just run an up to date version of Ubuntu or Linux Mint either... Since the kernel version they use doesn't like my wifi adapter... And even more frustrating is that it's like one version number off from being compatible.
Otherwise, it just shuts off after a few minutes... Gotta be 5.9 or greater, but they use 5.8 by default.
To make it even more annoying, the new Wayland window manager requires the Nvidia drivers to be set to 550 or higher... And those use 530ish by default.
I mean, the Noveau drivers do have Wayland support, but as I said... Stuck on first gear.
KDE on Wayland feels very comfortable to me, but... I have no idea how to address the secondary GPU reliably...
No idea if the backlight on the keyboard is gone because it's old or some sort of Asus firmware shenanigans.
I mean, it's ten years old at this point... And keeping this thing running is all I can afford unless some miracle happens.
0 notes
Text
Feather Lite, Ready to take the Flight?
With Linux generally perceived as complex and overwhelmingly-technical, can Linux Lite help you take the flight to the Linux side?

A screenshot of the default Linux Lite desktop, with Papirus and Materia on top of Xfce. Image courtesy of Linux Lite team.
If you're new to Linux or haven't heard of it yet, Linux Lite 6.6 is an Ubuntu-based distribution that aims to make the transition to the platform as smooth as possible. It uses Xfce with few customizations on top to resemble certain design cues from Windows.
Similar with previous releases, it is still based on Ubuntu Jammy Jellyfish and uses the 5.15 LTS kernel. As of the recent updates within the forum, there have been signs of development for the final release of 7.0 (codename Galena), which uses the 6.8.0-31 kernel and the recently released Noble Numbat.
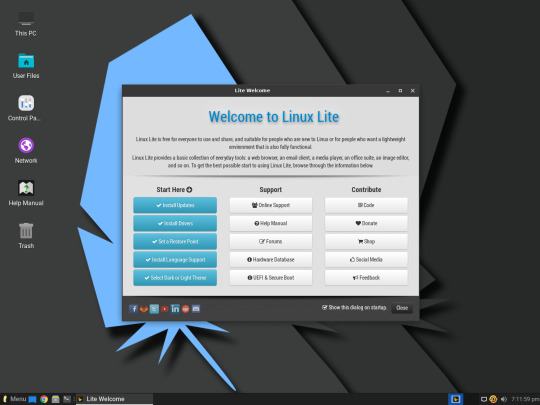
Default Linux Lite Welcome window. Image courtesy of Linux Lite team.
Upon logging in to the system, you will be greeted by the 'Lite Welcome' window which will guide you through the system setup and relevant resources. The welcome window is just one of the apps included in their 'suite' that sets the system apart by making certain tasks more intuitive to users. Some additions relevant to their suite include Lite Software (to install popular software), Lite Sources (managing repo sources), and Lite Tweaks (system cleaning and tweaking) among all others.
One of the most notable characteristics of this distribution is the uniformity of the user interface, thanks to the addition of the Papirus icon set and Materia theme. Perhaps, the only thing that sticks out of the entire look and feel are the icons of the Lite apps. Not to nitpick, but they could use a little bit of polishing so they can have a similar style to the rest of the icons.
Moving on to the preinstalled apps, 6.6 comes with Chrome, GIMP, LibreOffice, Thunderbird, and VLC. This backs the team's promise that "you won't have to install extra software," and you can use it completely out-of-the-box (setting aside drivers). The addition of Chrome may seem awry for most users considering that this is Linux but we have to consider their general audience. Most people would recognize Chrome immediately instead of Chromium.
Some users might be delighted to know that there are no snaps within Lite. The lead developer Jerry Bezencon also reassured users that snap will not be implemented with the upcoming Galena release. The live boot experience of the distro has also majorly improved from 5.8, rendering a very pleasant experience overall on a USB 3.0 device.
The Help Manual and documentation in their forums certainly help from time to time. In my daily use, I've encountered no issues overall. The system lives up to its lightweight reputation, running noticeably (and relatively) faster and consuming fewer resources than mainstream alternatives. With a mere 14GB footprint on my SSD and typically under 1GB of RAM usage, Linux Lite 6.6 proves that user-friendliness doesn't have to come at the expense of efficiency.
Given the system footprint, this distribution is very usable even on older hardware. However, with low memory, you might struggle with web browsing from time to time. I'd like to commend the team for the overall experience of this release. It might not be perfect, but it might help new users to take the flight to the Linux side.
1 note
·
View note
Text
Pop!_OS 20.10 veröffentlicht: Basierend auf Ubuntu 20.10
System76 hat ein neues Linux-Betriebssystem Pop!_OS 20.10 angekündigt. Die neueste Version von Pop OS basiert auf Ubuntu 20.10 Groovy Gorilla, das vor einigen Tagen veröffentlicht wurde. Neue Änderungen an Pop!_OS 20.10 Linux-Kernel-Version 5.8 GNOME 3.38 Unterstützung für das Deb822-Repository-Format STAPELN AUSNAHMEN FÜR FLOATISCHE FENSTER UNTERSTÜTZUNG EINES EXTERNEN MONITORS IM…

View On WordPress
0 notes
Text
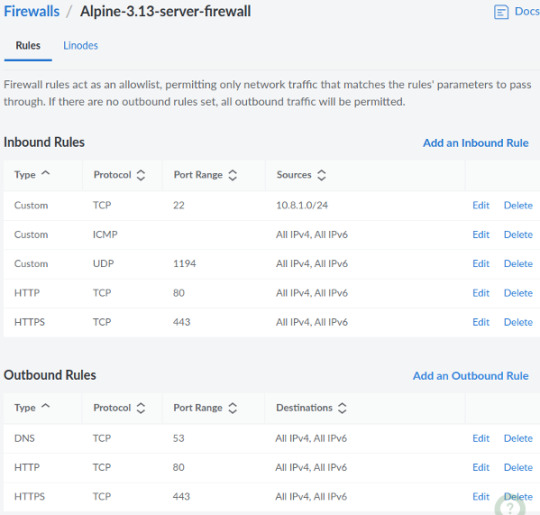
Linode cloud firewall: Do you need it to protect the Linux server?
Linode cloud firewall: Do you need it to protect the Linux server?
Linode is an original cloud platform and founded before AWS. Back then, we used to call them VPS (Virtual Private Server). Recently they added a new firewall feature to control network access to my Linode server from the Cloud. Let us test drive Linode cloud firewall. What is a Linode cloud firewall? A firewall is nothing but simple rules that filters out malicious traffic reaching your Linux…
View On WordPress
#linux commands for beginners#linux find file newer than#linux kernel 5.8#linux mint 20#linux mint download for virtualbox
0 notes
Video
youtube
Ubuntu Budgie 20.10 - Ship with Budgie Desktop 10.5.1, Add new Mojave Theme/Icons And Font Makeover
The Ubuntu Budgie Project Team has been announced and released Ubuntu Budgie 20.10 October 22rd, 2020. Ubuntu Budgie 20.10 will be supported with security and software updates for 9 months, until April 2021, This release rolls-up various developments, fixes and optimizations that have been released since the 18.04 LTS.
The highlight of the release Ubuntu Budgie 20.10 is using Budgie Desktop 10.5.1 as default desktop, Application menu now leverages the search facility to find the various parts of GNOME Settings. Many icons previously displayed are now stripped out allowing quicker visual access to applications. Also, look out for the optional rollover capability now in the category view.
Include a full Mac-like makeover using the fabulous Mojave theme and icons through a click of a button. Add a new optional applet to replace the menu to present a full-screen application icons display based on a new project called lightpad.
Window Shuffler – enable/disabling the capability is now dynamic - there is no need to logout/login, a new capability to resize adjacent windows automatically. Ubuntu 20.10 powered by Linux Kernel 5.8 and compatibility with GNOME 3.38 packages.
Download Ubuntu Budgie 20.10 : https://ubuntubudgie.org/downloads/
#Ubuntu Budgie 20.10#Ubuntu Budgie#Budgie Desktop#Linux#Open Source#Linux Distribution#Open Source Software
6 notes
·
View notes
Link
2020年10月22日(現地時間)、Ubuntu 20.10 (Groovy Gorilla) がリリースされました。Linux Kernel 5.8 や GNOME 3.38 など、新しいバージョンのソフトウェアになっているということですが、実際に確認したかったので、...
1 note
·
View note
Text
This is a guide on How to install latest VirtualBox, VirtualBox Guest Additions and Extension Pack on Arch Linux. Arch Linux is one of the most customizable, if not the best customizable Linux Distribution. On Arch Linux, you can easily get latest VirtualBox from either Pacman mirrors or pull it directly from AUR. I started using Arch Linux in 2015 and I have enjoyed the experience so far. It’s super fast, stable, easy to customize and many bells and whistles you can enjoy with this Linux distro. Without further ado, let’s get into the installation of VirtualBox on Arch Linux. What is VirtualBox? As you all know, VirtualBox is a free, cross-platform consumer virtualization product. It’s one of most used Hypervisor for home/personal use. It allows you to run more than one operating system on top of existing Operating system.it’s free to use, Can run on Windows, Linux and Unix systems. One major advantage of VirtualBox over free VMware Player is that vagrant tool for managing Virtual Machines is free for use with VirtualBox. But, withVMware, you’ll have to use the paid version of Vagrant that integrate withVMware. Update your packages list from the sources configured: $ sudo pacman -Syy :: Synchronizing package databases... core 136.8 KiB 251 KiB/s 00:01 [########################################################################] 100% extra 1601.0 KiB 2.86 MiB/s 00:01 [########################################################################] 100% community 5.8 MiB 7.04 MiB/s 00:01 [########################################################################] 100% Update GPG keys sudo pacman -Sy archlinux-keyring sudo pacman-key --populate archlinux Perform an upgrade and install linux headers, then reboot the system sudo pacman -Syu sudo pacman -S linux-headers sudo reboot Installing VirtualBox on Arch Linux It’s easy to install VirtualBox on Arch Linux, just issue the following command on the terminal, and boom!, VirtualBox is installed. $ sudo pacman -S virtualbox virtualbox-guest-iso resolving dependencies... :: There are 2 providers available for VIRTUALBOX-HOST-MODULES: :: Repository community 1) virtualbox-host-dkms 2) virtualbox-host-modules-arch Enter a number (default=1): 1 looking for conflicting packages... ......... Total Download Size: 205.20 MiB Total Installed Size: 801.17 MiB :: Proceed with installation? [Y/n] y After installing, we’ll have to make the current system user a member of the vboxusers group. This will grant the user permissions to manage Virtual machines. $ sudo gpasswd -a $USER vboxusers Adding user arch to group vboxusers Next step is to enable VirtualBox kernel modules to load automatically at boot time. $ sudo systemctl enable vboxweb.service Created symlink /etc/systemd/system/multi-user.target.wants/vboxweb.service → /usr/lib/systemd/system/vboxweb.service. Installing VirtualBox Extension Pack on Arch Linux Up to this step, we’ve installed VirtualBox,Virtualbox-guest-iso,utils,dkms.The only remaining part is the installation of Extension pack which provides support for USB 2.0 devices, VirtualBox RDP and PXE boot for Intel cards. Install it using steps below: Install yay: sudo pacman -S --needed git base-devel git clone https://aur.archlinux.org/yay-bin.git cd yay-bin makepkg -si Installing VirtualBox Extension Pack: yay -Syu yay -S rdesktop Make sure you’re running below command as a non-root user. $ yay -S virtualbox-ext-oracle --noconfirm :: Checking for conflicts... :: Checking for inner conflicts... [Aur:1] virtualbox-ext-oracle-6.1.38-1 ......... loading packages... resolving dependencies... looking for conflicting packages... Packages (1) virtualbox-ext-oracle-6.1.38-1
Total Installed Size: 1.65 MiB :: Proceed with installation? [Y/n] (1/1) checking keys in keyring [########################################################################] 100% (1/1) checking package integrity [########################################################################] 100% (1/1) loading package files [########################################################################] 100% (1/1) checking for file conflicts [########################################################################] 100% (1/1) checking available disk space [########################################################################] 100% :: Processing package changes... (1/1) installing virtualbox-ext-oracle [########################################################################] 100% 0%...10%...20%...30%...40%...50%...60%...70%...80%...90%...100% Optional dependencies for virtualbox-ext-oracle rdesktop: client to connect vm via RDP [installed] :: Running post-transaction hooks... (1/1) Arming ConditionNeedsUpdate... In case you downloaded Extension pack manually from Oracle VirtualBox’s web site, you may use below command to install: VBoxManage extpack install If you’ll be using vboxweb, you can enable it to start on boot up. sudo systemctl enable vboxweb.service sudo systemctl start vboxweb.service Manually invoke start of VirtualBox modules by sudo /sbin/rcvboxdrv setup Then check: $ ps ax | grep -i vbox If you’re running Debian or Debian Derivative distributions like Kali Linux, Ubuntu, Xubuntu, Kubuntu, Linux Mint, Elementary OS e.t.c. Check out this tutorial on installing Latest VirtualBox on such systems: How to install Virtualbox Latest on Ubuntu and Kali Linux
0 notes
Text
Linux Kernel 5.8 erreicht das Ende seiner Lebensdauer, besseres Upgrade auf die neueste Version
Die Linux 5.8-Kernel-Serie hat das Ende ihrer Lebensdauer erreicht und es ist besser, wenn Sie Ihren Linux-Kernel auf die neueste Version oder auf die Linux 5.9-Serie aktualisieren. Wenn Sie weiterhin mit dem Linux 5.8-Kernel arbeiten möchten, sollten Sie wissen, dass der Linux Kernel 5.8 keine weiteren Updates mehr erhält. Linux Kernel 5.8 erreicht das Ende seiner Lebensdauer, besseres Upgrade…

View On WordPress
0 notes
Text
Bluetooth csr 4.0 dongle driver

#BLUETOOTH CSR 4.0 DONGLE DRIVER INSTALL#
#BLUETOOTH CSR 4.0 DONGLE DRIVER DRIVERS#
#BLUETOOTH CSR 4.0 DONGLE DRIVER UPDATE#
#BLUETOOTH CSR 4.0 DONGLE DRIVER DRIVER#
#BLUETOOTH CSR 4.0 DONGLE DRIVER PATCH#
Bluetooth: RFCOMM socket layer initialized Bluetooth: BNEP socket layer initialized Bluetooth: BNEP filters: protocol multicast Bluetooth: BNEP (Ethernet Emulation) ver 1.3 Modules linked in: kvm_intel(+) kvm snd_hda_codec_realtek Bluetooth: HCI Realtek H5 protocol initialized Bluetooth: L2CAP socket layer initialized Bluetooth: HCI device and connection manager initialized Bus 003 Device 001: ID 1d6b:0002 Linux Foundation 2.0 root hub Integrated Rate Matching Hubīus 001 Device 001: ID 1d6b:0002 Linux Foundation 2.0 root hubīus 004 Device 001: ID 1d6b:0003 Linux Foundation 3.0 root hub Integrated Rate Matching Hubīus 002 Device 001: ID 1d6b:0002 Linux Foundation 2.0 root hubīus 001 Device 002: ID 8087:8008 Intel Corp. Subsystem: Gigabyte Technology Co., Ltd Onboard Ethernet īus 002 Device 002: ID 8087:8000 Intel Corp. RTL8111/8168/8411 PCI Express Gigabit Ethernet Controller (rev 0c) Uname -a lspci -nnk | grep -iA2 net lsusb dmesg | grep -i bluetooth dmesg | grep -i firmware lsmod | grep bluetooth Linux eliasc 4.15.0-144-generic #148-Ubuntu SMP Sat May 8 02:33: x86_64 x86_64 x86_64 GNU/LinuxĠ3:00.0 Ethernet controller : Realtek Semiconductor Co., Ltd. Vermagic: 4.15.0-144-generic SMP mod_unload modversionsīus 003 Device 004: ID 0bda:8771 Realtek Semiconductor Corp.
#BLUETOOTH CSR 4.0 DONGLE DRIVER DRIVER#
sudo modprobe btusb "not found" appears to me while bluetooth worksīluetooth 520192 41 hci_uart,bnep,rtk_btusb,rfcommįilename: /lib/modules/4.15.0-144-generic/kernel/drivers/bluetooth/rtk_btusb.koĭescription: Realtek Bluetooth USB driver ver 3.1.897f3bb.20201202-173003Īlias: usb:v1358p*d*dc*dsc*dp*icE0isc01ip01in*Īlias: usb:v0489p*d*dc*dsc*dp*icE0isc01ip01in*Īlias: usb:v13D3p*d*dc*dsc*dp*icE0isc01ip01in*Īlias: usb:v0BDAp*d*dc*dsc*dp*icE0isc01ip01in*.
Useful commands for detection of bluetooth:
Caution! Don't forget when opening your Bluetooth that hackers may exist!.
Make it "permanent visible" in Adapter menu, if you like, for easier detection.
sudo modprobe rtk_btusb & dmesg | grep rtk.
#BLUETOOTH CSR 4.0 DONGLE DRIVER UPDATE#
Make again - sudo apt update & sudo apt upgrade.
#BLUETOOTH CSR 4.0 DONGLE DRIVER INSTALL#
cd ~/20200610_LINUX_BT_DRIVER and sudo make install INTERFACE=usb.Find a folder named something like this "20200610_LINUX_BT_DRIVER".
#BLUETOOTH CSR 4.0 DONGLE DRIVER DRIVERS#
Click on "USB Adapters" -> "Drivers", choose a USB adapter, and download the Linux drivers as suggested by Martin (I chose one at random).
Go to /pages/download as suggested by Martin.
sudo apt install bluetooth blueman bluez bluez-tools rfkill libbluetooth-dev.
sudo add-apt-repository ppa:hanipouspilot/bluetooth.
Kdeconnect wireless transfer files between andoid and linux desktop
In some seconds, I transferred 50mbs to my Linux desktop.
Faster way to transfer files wirelessly from Android to Linux Desktop / PC (and much more) is by using KDE connect.
and 20 seconds to transfer a single image file (~7mb). HCI tools (as I read) are useful for hardware devices e.g. NOTE 1: You need "Bluetooth USB" instructions, NOT "Bluetooth Device" instructions. Does anybody have experience with this, and is able to give some advice what is necessary to get it working?
#BLUETOOTH CSR 4.0 DONGLE DRIVER PATCH#
This forum post mentions a kernel patch which seems to be necessary, which (from what they write) is only present in the mainstream kernel 5.8 - since I am using ubuntu 18.04 LTS, my kernel version is 4.15.0-136. I searched for solutions, and the best hit I found was this forum post - although the chipset (idVendor & idProduct) seems to match with my hardware, I am quite unsure if those drivers are useable for me (since my dongle is manufactured from a complete different company). I: If#= 1 Alt= 0 #EPs= 2 Cls=e0(wlcon) Sub=01 Prot=01 Driver=btusb I: If#= 0 Alt= 0 #EPs= 3 Cls=e0(wlcon) Sub=01 Prot=01 Driver=btusb Bluetooth: hci0: download fw command failed (-110) Bluetooth: hci0: command 0xfc20 tx timeout Bluetooth: hci0: cfg_sz 0, total size 20204 Bluetooth: hci0: rom_version status=0 version=1 Bluetooth: hci0: rtl: loading rtl_bt/rtl8761a_fw.bin bluetooth hci0: Direct firmware load for rtl_bt/rtl8761a_config.bin failed with error -2 Bluetooth: hci0: rtl: loading rtl_bt/rtl8761a_config.bin Bluetooth: hci0: rtl: examining hci_ver=0a hci_rev=000b lmp_ver=0a lmp_subver=8761 usb 1-4: New USB device strings: Mfr=1, Product=2, SerialNumber=3 usb 1-4: New USB device found, idVendor=0bda, idProduct=8771 Whenever I plug it in, these messages appear in dmesg: usb 1-4: new full-speed USB device number 9 using xhci_hcd I bought a bluetooth dongle ( Logilink BT0054), and did want to get it working on linux.
0 notes
Text
Vimicro usb camera altair driver

Video 127 0 0 1 Vimicro USB Camera Altair 04 05 16 21 01 05 21 02 52.
Manual Vimicro Usb Camera Altair Driver.
Vimicro Usb2.0 Pc Camera Driver Download.
USB Camera Driver Download For Windows.
How to download Altair Camera Software and Drivers.
USB 10x64 Camera Driver for Windows 10 (x64) | USB | Webcam Drivers.
Vimicro Usb 2.0 Pc Camera Venus Driver Windows 10.
Vimicro USB PC Camera (VC0321) - Free download and software.
Vimicro USB Camera (Altair) Driver Download - PC Matic.
China PC Camera, USB 2.0 Camera - China Driverless and Plug and Play price.
Solaris USB camera drivers download | SourceF.
(Linux-uvc-devel) Vimicro USB Camera (Altair) - narkive.
USB Camera Driver Download.
Vimicro Usb Camera Altair Драйвер - regulationsmed.
Video 127 0 0 1 Vimicro USB Camera Altair 04 05 16 21 01 05 21 02 52.
For Vimicro Tv Usb 2.0 Movie Capture User. Scar 6 20:51:51 server kernel: Linux movie capture user interface: v2.00. Mar 6 20:51:51 machine kernel: uvcvideo: Present UVC 1.00 gadget Vimicro USB Camcorder (Altair) (0ac8:3450). Scar 6 20:51:51 machine kernel: insight: Vimicro USB Video camera (Altair) as classinputinput3. The 6.64.2018.9 version of USB Webcam is available as a free download on our software library. Our built-in antivirus checked this download and rated it as virus free. The most popular versions of the program are 323.7, 6.6 and 5.8. The latest version of USB Webcam is supported on PCs running Windows XP/Vista/7/8/10/11, 32-bit.
Manual Vimicro Usb Camera Altair Driver.
File Name: Version: 1.3.5 Driver Date: 20 September 2020 File Size: 9,213 KB Rating: 4.85/5. 1) Choose Operation System: Downloaded: 35,555 times Last Time: 16 July 2022. On you can find. Great, many thanks for Windows 7 ultimate usb 3.0 18-Apr-18 08:32 Many Thanks... 14-Mar-18 18:21 I've been looking for this driver all day, so thank you! 20-Feb-18 09:38 good fast download. thanks. 16-Jan-18 14:40 excellent Windows 7 ultimate usb 3.0 guide as always. Download VIMICRO USB PC Camera (VC0303) - Driver cho bộ xử lý camera máy tính. VIMICRO USB PC Camera (VC0303) là driver cho webcam và camera trên máy tính hỗ trợ chụp ảnh nhanh chóng và chất lượng, cho bạn những thước phim sắc nét nhất. Với những ai thường xuyên phải làm việc với webcam.
Vimicro Usb2.0 Pc Camera Driver Download.
Download for free USB 10x64 Camera Driver for Windows 10 (x64) DE (Deutsch) EN (English) ES (Español) FR (Français) IT (Italiano) PT (Português) RO (Română) RU (Русский) Webcam Test. ( 5.573796) usbcore: registered new interface driver usb-storage ( 5.585174) USB Mass Storage support registered. ( 5.595298) usbcore: registered new interface driver libusual ( 5.607001) mousedev: PS/2 mouse device common for all mice... ( 83.625747) usb 1-1.2.1: Product: Vimicro USB Camera (Altair) ( 83.625777) usb 1-1.2.1: Manufacturer: Vimicro. Download Altair's software products. Altair and our resellers need your email address to contact you about our products and services.
USB Camera Driver Download For Windows.
Download Pdf Manual Vimicro Usb Camera Altair Driver How to Download EBook Free PDF Read Pdf Manual Vimicro Usb Camera Alt... Read More. Home. Subscribe to: Posts (Atom) Search This Blog. Powered by Blogger. Labels. Download PDF Online Richtig Mountainbiken: Technik - Training - Tourenplanung Download Links PDF; Link Download Is That What They. This page contains drivers for USB Camera (Altair) manufactured by Vimicro™. Please note we are carefully scanning all the content on our website for viruses and trojans. This and other Cameras drivers we're hosting are 100%. China PC Camera, USB 2.0 Camera, Find details and Price about China Driverless, Plug and Play from PC Camera, USB 2.0 Camera - Shenzhen Kingsen Technology Co., Ltd. Sign In Join Free.
How to download Altair Camera Software and Drivers.
Selected device: Vimicro USB Camera (Altair) Capabilites: video capture streaming supported norms: inputs: 0 = Camera 1; Current input: 0 Current format: YUYV v4l2: ioctl set format failed: Invalid argument v4l2: ioctl set format failed: Invalid argument v4l2: ioctl set format failed: Invalid argument tv.c: norm_from_string (pal): Bogus norm.
USB 10x64 Camera Driver for Windows 10 (x64) | USB | Webcam Drivers.
Gear Head Plug-n-Play WC750RED-CP10 Webcam The Gear Head Plug-n-Play WC750RED-CP10 Webcam easily connects to your PC or Mac operating system. With a 1.3 megapixel picture resolution and a built-in microphone, this webcam ensures that you are seen and heard clearly. Stay connected with your loved ones using the Gear Head Plug-n-Play WC750RED. VIMICRO USB PC CAMERA ALTAIR DRIVER FOR WINDOWS DOWNLOAD. Frontech e-cam usb Treiber Windows Xp. Several Drivers Cloud: FRONTECH E CAM GEM JIL 2225 DRIVER DOWNLOAD FREE. All About Driver All Device: Download Driver Webcam Neox. COLORVIS PC CAMERA DRIVERS FOR WINDOWS. Vimicro usb camera altair como instalar Instalar webcam Vimicro VC0303, no tengo CD - Foros - Drivers Genius usb camera videocam eye v2 0 driver windows 7 - Foros - Drivers.
Vimicro Usb 2.0 Pc Camera Venus Driver Windows 10.
11 rows. 0ac8:3450 Z-Star Microelectronics Vimicro USB Camera (Altair) camera.... v4l2: your device driver does not support VIDIOC_G_STD ioctl, VIDIOC_G_PARM was.
Vimicro USB PC Camera (VC0321) - Free download and software.
Fast and Secure Driver Download. Vimicro usb camera altair driver windows 10. File Name: vimicro-usb-camera-altair-driver-windows-10Windows 10 no problem on the same system and BIOS settings. Does anybody here uses the same USB dongle for Live Streaming or recording HDMI to the PC/Hackintosh? I tried it with both Quicktime and OBS.
Vimicro USB Camera (Altair) Driver Download - PC Matic.
Created on August 11, 2011 ViMicro USB WebCam (Altair) works on my brother's PC with Vista, but not Windows 7. Driver installation errors. Okay, so first things first. Hi, My name is ClipTy. I'm new to the forum and I've never had to use it til today. I. Webcam 1-2-3 is a powerful yet easy to use software to broadcast live videoon the web. After installation, you can simply hit a "Publish" button tostart the live broadcast on the Internet. Webcam 1-2-3 also supportsinstant messengers like AOL AIM, ICQ, and Yahoo so you can easilychat with your Webcam visitors.
China PC Camera, USB 2.0 Camera - China Driverless and Plug and Play price.
Vimicro USB Camera (Altair) - для данного устройства найдено 6 драйверов, которые вы можете скачать на нашем сайте абсолютно бесплатно.... Vimicro USB Camera (Altair) Drivers Installer: Версия драйвера: 2.0.0.18: Дата драйвера. Manual Vimicro Usb Camera Altair Driver Author: T00:00:00+00:01 Subject: Manual Vimicro Usb Camera Altair Driver Keywords: manual, vimicro, usb, camera, altair, driver Created Date: 7/14/2022 2:51:38 PM.
Solaris USB camera drivers download | SourceF.
Get the latest official Vimicro USB PC Camera (ZC0302) imaging and camera drivers for Windows 11, 10, 8.1, 8, 7, Vista, XP PCs. Update drivers with the largest database available.
(Linux-uvc-devel) Vimicro USB Camera (Altair) - narkive.
USB PC Camera (SN9C103) Serial (USB PC Camera usb pc camera driver 2015). Vimicro Usb Camera Altair Software - Free Download Vimicro. Nov 11, 2010 · Download Vimicro Venus USB2.0 Camera Windows Drivers Device: Any device Bios Cameras Game Devices Input Devices Laptops - Desktops Modems Motherboards Network Adapters Other Printers Projectors.
USB Camera Driver Download.
Vimicro USB 2.0 PC Camera (Venus) - Driver Download * Vendor: * Product: Vimicro USB 2.0 PC Camera (Venus) * Hardware Class: Media.. Webcam Drivers | Webcam Test. Download USB WebCam Driver 1.1 for Mac - F. Need a generic USB Webcam driver | Tech Support Guy. Where can I download the Vimicro USB 2.0 PC Camera Venus driver. Camera amp; Scanner Drivers Download | D. USB 2.0 web camera driver for Windows 10 Home. USB WebCam Driver free download Windows version. Universal Usb.
Vimicro Usb Camera Altair Драйвер - regulationsmed.
Vimicro Altair Driver; Dual Mode Usb Pc Camera Altair; Vimicro Usb Camera Pc; Vimicro Usb Pc Camera; Vimicro Usb Camera Altair Software. Altair v.2.0. Altair is an astronomy calculator for Windows. Altair calculates Local Sidereal Time, Julian Date, Universal Time, RA/DEC to Alt/Az and Alt/Az to RA/DEC.
Other content:
0 notes
Text
Android 12 flaw allows hacking some smartphones including Galaxy S22
Android 12 flaw allows hacking some smartphones including Galaxy S22
A couple of days in the past, a developer referred to as Max Kellermann found a serious safety flaw in Linux kernel model 5.8. Found in 2020, this breach additionally impacts later variations of the kernel. The researcher titled the flaw “Soiled Pipe”. The vulnerability impacts all gadgets with an working system that depends on a Linux kernel, comparable to Android smartphones/tablets, Google…

View On WordPress
0 notes
Text
Dirty Pipe vulnerability: Is your Chromebook affected?
Dirty Pipe vulnerability: Is your Chromebook affected?
A Linux vulnerability referred to as “Dirty Pipe” (CVE-2022-0847), has recently been publicly disclosed affecting kernels higher than 5.8, which can grant any attacker root privileges to your device. This exploit, first reported by known security researcher Max Kellerman, has been coined the biggest security threat to Linux in years and can affect any Linux-powered device, such as Chromebooks and…

View On WordPress
0 notes
Photo
. مارک کلرمن، توسعه دهنده نرم افزاری کمپانی IONOS، اخیراً یک نقص امنیتی مهم در هسته لینوکس کشف کرده است که میتواند به مهاجمان اجازه دهد تا با بازنویسی دادههای دلخواه در هر فایل فقط خواندنی، سیستمهای آسیبپذیر را کنترل کنند. این آسیبپذیری که Dirty Pipe نامیده میشود و تحت عنوان CVE-2022-0847 با امتیاز CVSS معادل 7.8 شناخته شده است، میتواند به افزایش سطح دسترسی منجر شود، زیرا فرآیندهای غیرمجاز میتوانند کد را به فرآیندهای ریشه تزریق کنند. محققان معتقدند این نقص هسته از نسخه 5.8 وجود داشته است زیرا شباهت هایی با Dirty Cow (CVE-2016-5195) که در اکتبر 2016 به عنوان یک آسیب پذیری ظاهر شد، دارد. "یک کاربر محلی غیرمجاز میتواند از این نقص برای نوشتن در صفحات در حافظه پنهان صفحه که توسط فایلهای فقط خواندنی پشتیبانی میشوند استفاده کند و به این ترتیب دسترسی خود را در سیستم افزایش دهد." به عبارت دیگر، این آسیبپذیری میتواند به عوامل تهدید اجازه دهد عملیات مختلفی را روی سیستم در معرض خطر انجام دهند. به عنوان مثال، آنها میتوانند رمز عبور کاربر اصلی را با دستکاری فایلهای حساس مانند /etc/passwd حذف کنند، باینریهای دلخواه را با دسترسی بالا اجرا کنند، یا با افزودن کلیدهای SSH، دسترسی از راه دور را فعال کنند. بدتر از آن، این نقص به مجوزهای نوشتن نیاز ندارد و روی اسنپ شات های btrfs فقط خواندنی، mount های فقط خواندنی (از جمله درایو نوری) و فایل های غیر قابل تغییر قابلیت اعمال دارد و دلیل این امر آن است که Cache صفحه همیشه (توسط هسته) قابل نوشتن است و نوشتن در یک Pipe هرگز هیچ مجوزی را بررسی نمی کند. ⚠️ این آسیبپذیری در نسخههای لینوکس کرنل 5.16.11، 5.15.25 و 5.10.102 اصلاح شده است. با توجه به سطح تهدید این آسیبپذیری و سهولت استفاده از آن، کاربران باید سرورهای لینوکس خود را بهروزرسانی کنند و توزیعهای لینوکس خود را در اسرع وقت وصله نمایند. #bitdefender #adrion #adrion_ir #linux #kernel #vulnerability #cve_2022_0847 #dirtypipe #industrynews #بیت_دیفندر #آدرین #لینوکس #امنیت #آسیب_پذیری #کرنل — view on Instagram https://ift.tt/gVvtcYy
0 notes
Text
Germany Driver Download For Windows

On this page there are links to download driver software writtenby Meinberg, and also associated manuals inAdobe PDF format.
Germany Driver Download For Windows 8.1
Germany Driver Download For Windows 10
Germany Driver Download For Windows Xp
Germany Driver Download For Windows
Germany Driver Download For Windows 7
There is driver software for the following operating systems available:
On Unix-like operating systems all Meinberg radio clockswith a serial port are supported by the public domainNetwork Time Protocol (NTP)package. Under Windows NT/2000 and newer, NTP canbe used together with Meinberg's driversto synchronize additional computers on the TCP/IP network.
Germany Driver Download For Windows 8.1
Select Search automatically for updated driver software. Select Update Driver. If Windows doesn't find a new driver, you can try looking for one on the device manufacturer's website and follow their instructions. Reinstall the device driver. In the search box on the taskbar, enter device manager, then select Device Manager. Download the latest version of German Truck Simulator for Windows. Drive a lorry across Germany. German Truck Simulator is a driving simulator offering us the.
NTP software and manuals are available at our NTP download page.
Download MEINBERG NTP / PTP Simulation Software (Demo):
MPSv2 Change Log Recommended operating systems: Linux Mint ≥ 18.3 (64 bit) or Ubuntu ≥ 18.04.
Additionally there are some utilities available for download:
Meinberg Device Manager (Windows and Linux)for configuration and monitoring of Meinberg receivers via the serial interface or network connection(supersedes the gpsmon32 monitoring software)
MBG Flash Used to update firmware of radio clocks and otherdevices with flash memory.
More Ressources:
Software Development Kits SDKs for different programming languagesand development environments to access a Meinberg device from within an own applications.
Shapes for Microsoft Visio Shapes for various Meinberg systemsand accessories, to be used with Microsoft Visio
SNMP MIB Files Management Information Base files for various Meinberg systemsand accessories, to be used with SNMP-based Network Management Systems like HP OpenView or IBM Tivoli.
Driver Software for all Windows versions since Windows NT
Windows NT up to Windows 10 Windows Server 2019 Platform i386 (32 Bit) Platform x64 (64 Bit) Software dkwin-3.10.exe July 2, 2020 1.5 Mbytes How to verify integrity of the downloaded file Release Notes
The driver package can be used to synchronize the computer's system time.It supports all Meinberg plug-in radio clocks for PCs with PCI or ISA bus,all Meinberg USB devicesand all external radio clocks which are connected to a serial portof the computer (COM port) and transmit theMeinberg standard time string.
The Meinberg Time Adjustment Service runs in the backgroundand keeps the system time synchronized with the radio clock's time.
The monitoring utility MBGMON can be used to start, stop,control, and monitor the time adjustment service. The program isalso used to monitor and configure the supported plug-in boardsand USB devices.
Detailed information on the software can be found in the onlinehelp of the monitoring utility.
The public domain NTP software packagecan be used together with this driver package to synchronize additionalcomputers over the TCP/IP network.
Driver Software for DOS, Windows 3.x/9x
DOS Windows 3.x Windows 9x Software dkdos223.zip August 14, 2007 127505 bytes Manual German softdos.pdf Manual English softdos.pdf
The driver package for DOS/Windows 3.x/Windows 9.x supports allMeinberg plug-in radio clocks for PCs.This driver does not support radio clocks connected via aserial interface.
The resident driver (TSR) reads the time from a radio clockin periodic intervals and sets the computer's system time.
If the computer operates in DOS text mode the current radio clock timecan be displayed in a box at a corner of the screen.
The monitoring program PCPSINFO shows the radio clock's and theTSR's status information and can be used to setup configurableparameters of the plug-in cards.
Hint for PCI Cards: Plug-and-play driver installation on Windows is not supported.
If Windows starts up after a new PCI card has been installedit tries to locate a driver for the new card. Every popupdialog should be acknowledged by pressing OK, so Windowswill install an 'unknown device'.
After Windows startup has been completed, the DOS driver canbe installed normally.
Attention: If the installation of the 'unknown device' is aborted,Windows will ask again for a driver when it starts upthe next time.
Version Information:
DKDOS223:
Additionally support the new PCI Express cardsPEX511,GPS170PEX, andTCR511PEX.
DKDOS222:
Fixed a bug where the TSR did not always recognize some older PCI cards.
Enhanced configuration dialog for the synthesizer settings.
DKDOS221:
Additionally support the new PCI cardsPCI511,GPS170PCI, andTCR511PCI.
Windows 9x Windows ME Software win9xv13.zip August 11, 2003 539326 bytes Manual German mbgtimemon.pdf Manual English Not available
In addition to our resident DOS/Windows driver (see above), there is a driver for Windows 9x/MEavailable that supports time synchronization over a serial interface.
The driver package for Windows 9x can be used with all external radio clocks which areattached to a serial port of the computer (COM port) and transmit theMeinberg standard time string.
The driver package reads the time from a radio clock in periodic intervals and sets the computer's system time.
Time deviations will be ascertained and corrected by the driver program. The driver runs in the backgroundand keeps the system time synchronized with the radio clock's time.The driver will be shown in the windows traybar. Additionally, the program is used to display status informationfrom the clock and of the current time synchronization as well.
Driver Software for Linux
MBGTOOLS for Linux Kernel 5.x Kernel 4.x Kernel 3.x Kernel 2.6.x Platform i386 Platform x86_64 Software mbgtools-lx-4.2.14.tar.gz 2020-10-20 800k bytes SHA512 Checksum: mbgtools-lx-4.2.14.tar.gz.sha512sum How to verify integrity of the downloaded file Release Notes git-Repositiory
Important notice: For Linux kernels 5.8 or newer, no driver packageolder than 4.2.12 should be used. For details see thechangelog entry.
This archive contains a Linux driver module for Meinbergplug-in radio clocks with PCI or ISA bus, and Meinberg USB devices.This driver is only required for plug-in radio clocks and USB devices.Radio clocks which are connected via a serial interface are directly supported byNTP.
The driver allows access to a plug-in radio clock from a userprogram, and additionally implements a device which makes theradio clock available as a reference clock forNTP.
The driver is shipped as source code and has to be compiled on the target system.The current version 4.x can be used with Linux kernels 2.6.x, 3.x, 4.x and 5.x up to at least 5.9.
Supported hardware architectures include Intel/AMD 32 bit (i386, standard PC)and 64 bit (x86_64).
For more detailed information and installation instructionsplease refer to the README file which is included inthe archive.
Driver Software for FreeBSD
Germany Driver Download For Windows 10
MBGTOOLS for FreeBSD FreeBSD 8.x bis FreeBSD 12 Platform i386 Platform x86_64 Platform ARM Software mbgtools-fbsd-1.0.0.tar.gz 2017-07-06 550k bytes SHA512 Checksum: mbgtools-fbsd-1.0.0.tar.gz.sha512sum How to verify integrity of the downloaded file git-Repositiory
This archive contains a FreeBSD driver module for Meinbergplug-in radio clocks with PCI bus.This driver is only required for plug-in radio clocks.Radio clocks which are connected to the PC via a serial interface are directly supported by theNTP software.
The driver allows access to a plug-in radio clock from a userprogram, and additionally implements a device which makes theradio clock available as a reference clock forNTP.
The driver is shipped as source code and has to be compiled on the target system.The current version 1.0.0 can be used with FreeBSD 8 up to FreeBSD 12.
Supported hardware architectures include Intel/AMD 32 bit (i386, standard PC)and 64 bit (x86_64), and ARM.
For more detailed information and installation instructionsplease refer to the README file which is included inthe archive.
Driver Software for Novell NetWare
NetWare 3.1x NetWare 4.x NetWare 5.x NetWare 6.0 NetWare 6.5 Software dknw240.zip August 14, 2007 115804 bytes Manual German softnw.pdf Manual English softnw.pdf
The driver package for Novell NetWare supports allMeinberg plug-in radio clocks for PCs and all radio clockswhich send out the Meinberg standardtime string via serial RS-232 interface.
A time server NLM (NetWare Loadable Module) can be loadedon a file server which has a radio clock installed. The time serversoftware keeps the file server time synchronized with the radioclock's time and displays the radio clock and time synchronizationstatus.
With a plug-in radio clock forDCF77 the NLM can also be usedto check the received signal and second marks.
Additionally, the time server NLM makes the disciplined file servertime available on the IPX network.
A time client NLM can be loaded on additional file serverswithout own radio clock. The time client queries the reference timefrom a time server NLM running on another file server on the network.
The time server NLM can also send IPX broadcast time packetsto the network which can be received by DOS/Windows workstations tokeep workstation time synchronized to the file server time.
A memory resident IPX broadcast receiver for DOS/Windows 3.x/Windows9x is part of this driver package.
Workstations with modern operating systems can usually be synchronizedTCP/IP, using the Network Time Protocol (NTP).NetWare 5 and later also supports NTP direktly.The Netware server which has the role of a timeserver should run TIMESYNC.NLM v5.23or newer since NTP support in earlier versions of TIMSYNC:NLM has some bugs.
Version Information:
DKNW240:
Additionally support the new PCI Express cardsPEX511,GPS170PEX, andTCR511PEX.
DKNW230:
Additionally support new PCI devicesPCI511,GPS170PCI, andTCR511PCI.

Driver Software for OS/2
OS/2 2.1 OS/2 Warp OS/2 Warp 4 Software dkos2205.zip August 14, 2007 39206 bytes
The driver package for OS/2 supports all Meinberg plug-inradio clocks for PCs.
This driver does not support radio clocks connected via aserial interface.
The package includes a device driver and an utility runningunder the OS/2 Presentation Manager. The utility shows theradio clock's status and synchronizes the computer's systemtime to the radio clock's time.
With a plug-in radio clock forDCF77 the utility can also beused to check the received signal and second marks.
GPSMON32 (out of support since 2017-06)
GPSMON32 for Windows Software mbg-gpsmon32-v228.exe 2013-07-15 726,195 Bytes
This utility can be used to configure Meinberg GPS receivers via their serial ports.
The program has initially been written to be used with our GPSreceivers which do not have an own display. However, it can beused with any Meinberg GPS receiver with serial interface.
Detailed information on the program can be found in the online help.
Please note: Our support for this program will be discontinued in July 2017.In the future please use the Meinberg Device Managerfor our systems.
MBG Flash Program
MBGFLASH for Windows Software mbgflash-1.13.exe August 20, 2014 570 KB
This utility can be used to update the firmware of radio clockswhich have an onboard flash memory via the clock's serial port.Simply download and run the EXE file to install the utility.
Additionally, a firmware image file is required which is uploadedto the device. Be sure to use an image file which is appropriatefor the type of device.
Visio Shapes
Visio Shapes for MS Visio 2003 ZIP File meinberg_visio_shapes-2015.zip 2015-11-23 16 MB
This ZIP archive contains some .VSS files to be used with Microsoft Visio, containing shapesfor various Meinberg NTP time server models and radio clocks, representing these systemsin different form factors and types in your Visio drawings.
The files were created and have been tested with MS Visio 2003.Other versions for Visio 2000 and Visio 2002 are available on request.
More details about Microsoft Visio can be found onMicrosoft's Visio Homepage.
SNMP Management Information Base (MIB) Files
SNMP MIB Files ZIP Archive meinberg-mibs.zip 2020-04-09 62 kB
These files are required by most SNMP based network management systems in order to access the informationprovided by Meinberg products via SNMP.
Files included for SNMP-ROOT, LANTIME V5/V6/V7, XPT, FDMXPT, RSC (MDU), meinbergOS (microSync), SyncBox/N2X.
Advertisement
FS Amilo Li 1705 - Windows XP drivers v.200711Fujitsu-Siemens Amilo Li 1705 - WindowsXPdrivers (Audio,Graphic,Modem,LAN,WLan) All drivers are tested with Fujitsu-Siemens Amilo Li1705 notebook under WindowsXP SP2 Profesional and works fine.
Windows XP Tools v.6.3WindowsXP Tools utilities suite is an award winning collection of tools to clean, optimize and speedup your system performance. it works on WindowsXP, Vista, 2003 Server, 2000 and 98.
Windows XP Utilities v.6.21WindowsXP Utilities suite is a system tweaking suite that includes more than 20 tools to improve and tweak your PC's performance. WindowsXP Utilities offers an attractive and easy to use interface that organizes all tasks into categories and ...
Windows XP NTFS File Recovery v.2.0WindowsXPNTFS Data Recovery software is an apt NTFS file recovery tool & data recovery software for NTFS. WindowsXP NTFS file recovery software can easily get back NTFS files in many major data loss conditions by using its professional techniques.
Windows XP Recovery Software v.2.0Recover Data for WindowsXPrecovery software provides advanced technical features for solving your data loss troubles. This recovery software for WindowsXP can successfully recover windowsxp files from corrupted or formatted windows partition.
Microsoft Windows XP Backup Software v.4.2Our advance Microsoft WindowsXP Backup software to recover corrupt BKF file is a perfect solution that can easily recover & restore data from corrupt Windows Backup (.bkf) files. SysTools BKF Repair with advanced version 4.2 is powerful data ...
Windows XP Cleaner v.7.0WindowsXP Cleaner is a suite of tools to clean your system; it includes Disk Cleaner, Registry Cleaner, History Cleaner, BHO Remover, Duplicate files Cleaner and Startup Cleaner. this WindowsXP Cleaner suite allows you to remove unneeded files and ...
70-271 MCDST Troubleshoot Windows XP v.8.03.05PrepKit MCDST 70-271, Troubleshoot Microsoft WindowsXP is an interactive software application that helps you learn, tracks your progress, identifies areas for improvements and simulates the actual exam. This PrepKit contains 3 interactive practice ...
Windows XP Security Console v.3.5Doug's WindowsXP Security Console allows you to assign various restrictions to specific users, whether you're running XP Pro or XP Home ...
Windows XP Service Pack 3 (SP3) v.1.0WindowsXP Service Pack 3 (SP3) includes all previously released updates for the operating system.
Windows xp game trainers v.1.0my trainer's will let you change your scores on almost all of the windowsxp games located at start>all programs>games.
Windows XP Home Edition Utility: Setup Disks for Floppy Boot Install v.310994The WindowsXP startup disk allows computers without a bootable CD-ROM to perform a new installation of the operating system.
Harry Potter and Windows XPHarry Potter and WindowsXP offers you such free and beneficial icons from the icon artists. The icons copyright belongs original authors, they are free for personal and non commercial use / free for public non-commercial use only mention the ...
Windows XP Home Startup Disk SP1aThe WindowsXP startup disk allows computers without a bootable CD-ROM to perform a new installation of the operating system. The WindowsXP startup disk will automatically load the correct drivers to gain access to the CD-ROM drive and start a new ...
Windows XP Home Startup Disk v.310994The WindowsXP startup disk allows computers without a bootable CD-ROM to perform a new installation of the operating system. The WindowsXP startup disk will automatically load the correct drivers to gain access to the CD-ROM drive and start a new ...
Windows XP Pro Startup Disk v.310994The WindowsXP startup disk allows computers without a bootable CD-ROM to perform a new installation of the operating system. The WindowsXP startup disk will automatically load the correct drivers to gain access to the CD-ROM drive and start a new ...
Windows XP Pro Startup Disk SP1aThe WindowsXP startup disk allows computers without a bootable CD-ROM to perform a new installation of the operating system. The WindowsXP startup disk will automatically load the correct drivers to gain access to the CD-ROM drive and start a new ...
Windows XP SP1 Pro Startup Disk v.310994The WindowsXP startup disk allows computers without a bootable CD-ROM to perform a new installation of the operating system. The WindowsXP startup disk will automatically load the correct drivers to gain access to the CD-ROM drive and start a new ...
Delete Files Windows XP v.2.0.1.5Delete Files from Window XP permanently & also delete all the records permanently. Erase temporary internet files, typed URLs, history, cache, cookies and activity traces of application and system files. It remove critical records securely.
Windows XP Backup Recovery v.4.2Are you searching for a Windows Backup Recovery software with latest version? SysTools BKF Repair with advanced version 4.2 is powerful data recovery software for damaged Microsoft Backup files (.BKF). Recovers folder structure and files. Supports ...
Germany Driver Download For Windows Xp
Windows Xp Drivers software by TitlePopularityFreewareLinuxMac
Today's Top Ten Downloads for Windows Xp Drivers
Germany Driver Download For Windows
Windows XP Tools Windows XP Tools utilities suite is an award winning
Windows XP Service Pack 3 (SP3) Windows XP Service Pack 3 (SP3) includes all previously
Windows XP Backup Recovery Are you searching for a Windows Backup Recovery software
FS Amilo Li 1705 - Windows XP drivers Fujitsu-Siemens Amilo Li 1705 - Windows XP drivers
Windows XP Recovery Software Recover Data for Windows XP recovery software
Windows XP Utilities Windows XP Utilities suite is a system tweaking suite
Windows XP Home Edition Utility: Setup Disks The Windows XP startup disk allows computers without a
Windows XP Security Console Doug's Windows XP Security Console allows you to assign
Windows XP Pro Startup Disk The Windows XP startup disk allows computers without a
Windows Easy Transfer for transferring from Use Windows Easy Transfer to copy your files, photos,
Germany Driver Download For Windows 7
Visit HotFiles@Winsite for more of the top downloads here at WinSite!
0 notes
Text
Linux系统安全强化指南
PDF目录版本: 链接:https://caiyun.139.com/m/i?105CplpmjWXdE 提取码:LtCL
本文翻译自:https://madaidans-insecurities.github.io/guides/linux-hardening.html
译者Blog:http://blog.gaochao.me
本指南旨在说明如何尽可能地加强Linux的安全性和隐私性,并且不限于任何特定的指南。
免责声明:如果您不确定自己在做什么,请不要尝试在本文中使用任何内容。
本指南仅关注安全性和隐私性,而不关注性能,可用性或其他内容。
列出的所有命令都将需要root特权。以“ $”符号开头的单词表示一个变量,不同终端之间可能会有所不同。
选择正确的Linux发行版
选择一个好的Linux发行版有很多因素。
避免分发冻结程序包,因为它们在安全更新中通常很落后
不使用与Systemd机制的发行版。 Systemd包含许多不必要的攻击面;它尝试做的事情远远超出了必要,并且超出了初始化系统应做的事情。
使用musl作为默认的C库。 Musl专注于最小化,这会导致很小的攻击面,而其他C库(例如glibc)过于复杂,容易产生漏洞。例如,与musl中的极少数漏洞相比,glibc中的一百多个漏洞已被公开披露。尽管仅靠披露的CVE本身通常是不准确的统计信息,但有时这种情况有时可以用来表示过分的问题。 Musl还具有不错的漏洞利用缓解措施,尤其是其新的强化内存分配器。
最好默认情况下使用LibreSSL而不是OpenSSL的发行版。OpenSSL包含大量完全不必要的攻击面,并且遵循不良的安全做法。例如,它仍然保持OS / 2和VMS支持这些已有数十年历史的古老操作系统。这些令人讨厌的安全做法导致了可怕的Heartbleed漏洞。LibreSSL是OpenBSD团队的OpenSSL分支,它采用了出色的编程实践并消除了很多攻击面。在LibreSSL成立的第一年内,它缓解了许多漏洞,其中包括一些高严重性的漏洞。
用作强化操作系统基础的最佳发行版是Gentoo Linux,因为它可以让您精确地配置系统,以达到理想的效果,这将非常有用,尤其是参考我们在后面的章节中使用更安全的编译标志。
但是,由于Gentoo的巨大可用性缺陷,它对于许多人来说可能并不顺手。在这种情况下,Void Linux的Musl构建是一个很好的折衷方案。
内核
内核是操作系统的核心,不幸的是很容易受到攻击。正如Brad Spengler曾经说过的那样,可以将其视为系统上最大,最易受攻击的setuid根二进制文件。因此,对内核进行尽可能多的强化非常重要。
Stable vs LTS 内核
Linux内核以两种主要形式发布:稳定和长期支持(LTS)。稳定版本是较新的版本,而LTS发行版本是较老的稳定版本,长期以来一直受支持。选择上述任何一个发行版本都有许多后果。
Linux内核未使用CVE标识安全漏洞。这意味着大多数安全漏洞的修复程序不能向后移植到LTS内核。但是稳定版本包含到目前为止进行的所有安全修复。
但是,有了这些修复程序,稳定的内核将包含更多新功能,因此大大增加了内核的攻击面,并引入了大量新错误。相反,LTS内核的受攻击面较小,因为这些功能没有被不断添加。
此外,稳定的内核还包括更新的强化功能,以减轻LTS内核没有的某些利用。此类功能的一些示例是Lockdown LSM和STACKLEAK GCC插件。
总而言之,在选择稳定或LTS内核时需要权衡取舍。LTS内核具有较少的强化功能,并且并非当时所有的公共错误修复都已向后移植,但是通常它的攻击面更少,并且引入未知错误的可能性也较小。稳定的内核具有更多的强化功能,并且包括所有已知的错误修复,但它也具有更多的攻击面以及引入更多未知错误的机会更大。最后,最好使用较新的LTS分支(如4.19内核)。
Sysctl
Sysctl是允许用户配置某些内核设置并启用各种安全功能或禁用危险功能以减少攻击面的工具。要临时更改设置,您可以执行:
sysctl -w $tunable = $value
要永久更改sysctls,您可以将要更改的sysctls添加到/etc/sysctl.conf或/etc/sysctl.d中的相应文件,具体取决于您的Linux发行版。
以下是您应更改的建议sysctl设置。
Kernel self-protection
kernel.kptr_restrict=2
内核指针指向内核内存中的特定位置。这些在利用内核方面可能非常有用,但是默认情况下不会隐藏内核指针,例如,通过读取/proc/kallsyms的内容即可轻松发现它们。此设置旨在减轻内核指针泄漏。另外,您可以设置kernel.kptr_restrict = 1以仅从没有CAP_SYSLOG功能的进程中隐藏内核指针。
kernel.dmesg_restrict=1
dmesg是内核日志,它公开了大量有用的内核调试信息,但这通常会泄漏敏感信息,例如内核指针。更改上述sysctl设置会将内核日志限制为CAP_SYSLOG功能。
kernel.printk=3 3 3 3
尽管dmesg_restrict的值,启动过程中内核日志仍将显示在控制台中。能够在引导过程中记录屏幕的恶意软件可能会滥用此恶意软件以获得更高的特权。此选项可防止这些信息泄漏。必须将其与下面描述的某些引导参数结合使用才能完全有效。
kernel.unprivileged_bpf_disabled=1 net.core.bpf_jit_harden=2
eBPF暴露了很大的攻击面,因此需加以限制。这些系统将eBPF限制为CAP_BPF功能(在5.8之前的内核版本上为CAP_SYS_ADMIN),并启用JIT强化技术,例如常量绑定。
dev.tty.ldisc_autoload=0
这将加载TTY行规则限制为CAP_SYS_MODULE功能,以防止非特权的攻击者使用TIOCSETD ioctl加载易受攻击的线路规则,而该TIOCSETD ioctl之前已在许多漏洞利用中被滥用。
vm.unprivileged_userfaultfd=0
userfaultfd() 系统调用经常被滥用以利用“事后使用(use-after-free)”缺陷。因此,该sysctl用于将此syscall限制为CAP_SYS_PTRACE功能。
kernel.kexec_load_disabled=1
kexec是一个系统调用,用于在运行时引导另一个内核。可以滥用此功能来加载恶意内核并在内核模式下获得任意代码执行能力,因此该sysctl设置将被禁用。
kernel.sysrq=4
SysRq密钥向非特权用户公开了许多潜在的危险调试功能。与通常的假设相反,SysRq不仅是物理攻击的问题,而且还可以远程触发。该sysctl的值使其可以使用户只能使用SAK密钥,这对于安全地访问root是必不可少的。或者,您可以简单地将值设置为0以完全禁用SysRq。
kernel.unprivileged_userns_clone=0
用户名称空间是内核中的一项功能,旨在改善沙箱并使非特权用户易于访问它,但是,此功能公开了重要的内核攻击面,以进行特权升级,因此该sysctl将用户名称空间的使用限制为CAP_SYS_ADMIN功能。对于无特权的沙箱,建议使用具有很少攻击面的setuid二进制文件,以最大程度地减少特权升级的可能性。沙箱章节部分将进一步讨论此主题。
请注意,尽管该sysctl仅在某些Linux发行版中存在,因为它需要内核补丁。如果您的内核不包含此补丁,则可以通过设置user.max_user_namespaces = 0来完全禁用用户名称空间(包括root用户)。
kernel.perf_event_paranoid=3
性能事件会增加大量内核攻击面,并导致大量漏洞。此sysctl设置将性能事件的所有使用限制为CAP_PERFMON功能(5.8之前的内核版本为CAP_SYS_ADMIN)。
请注意,此sysctl设置需要在某些发行版中具备相关的内核补丁。否则,此设置等效于kernel.perf_event_paranoid = 2,它仅限制此功能的子集。
网络
net.ipv4.tcp_syncookies=1
这有助于防止SYN泛洪攻击,这种攻击是拒绝服务攻击的一种形式,在这种攻击中,攻击者发送大量虚假的SYN请求,以尝试消耗足够的资源以使系统对合法流量不响应。
net.ipv4.tcp_rfc1337=1
这通过丢弃处于时间等待状态的套接字的RST数据包来防止time-wait状态。
net.ipv4.conf.all.rp_filter=1 net.ipv4.conf.default.rp_filter=1
这些启用了源验证,以验证从计算机所有网络接口接收到的数据包。
net.ipv4.conf.all.accept_redirects=0 net.ipv4.conf.default.accept_redirects=0 net.ipv4.conf.all.secure_redirects=0 net.ipv4.conf.default.secure_redirects=0 net.ipv6.conf.all.accept_redirects=0 net.ipv6.conf.default.accept_redirects=0 net.ipv4.conf.all.send_redirects=0 net.ipv4.conf.default.send_redirects=0
这些设置禁用了ICMP重定向,以防止中间人攻击并最大程度地减少信息泄露。
net.ipv4.icmp_echo_ignore_all=1
此设置使您的系统忽略所有ICMP请求,以避免Smurf攻击,使设备更难以在网络上枚举,并防止通过ICMP时间戳识别时钟指纹。
net.ipv4.conf.all.accept_source_route=0 net.ipv4.conf.default.accept_source_route=0 net.ipv6.conf.all.accept_source_route=0 net.ipv6.conf.default.accept_source_route=0
源路由是一种允许用户重定向网络流量的机制。由于这可用于执行中间人攻击,在中间人攻击中,出于恶意目的将流量重定向,因此上述设置将会禁用此功能。
net.ipv6.conf.all.accept_ra=0 net.ipv6.conf.default.accept_ra=0
恶意的IPv6路由广告可能会导致中间人攻击,因此应将其禁用。
net.ipv4.tcp_sack=0 net.ipv4.tcp_dsack=0 net.ipv4.tcp_fack=0
禁用TCP SACK。ACK通常被利用,并且在许多情况下是不必要的,因此如果您不需要它,则应将其禁用。
用户空间
kernel.yama.ptrace_scope=2
ptrace是一个系统调用,它允许程序调试、修改和检查另一个正在运行的进程,从而使攻击者可以轻易修改其他正在运行的程序的内存。设置将ptrace的使用限制为仅具有CAP_SYS_PTRACE功能的进程。或者,将sysctl设置为3以完全禁用ptrace。
vm.mmap_rnd_bits=32 vm.mmap_rnd_compat_bits=16
ASLR是一种常见的漏洞利用缓解措施,它可以使进程的关键部分在内存中的位置随机化。这可能会使各种各样的漏洞利用更困难,因为它们首先需要信息泄漏。上述设置增加了用于mmap ASLR的熵的位数,从而提高了其有效性。
这些sysctls的值必须根据CPU体系结构进行设置。以上值与x86兼容,但其他体系结构可能有所不同。
fs.protected_symlinks=1 fs.protected_hardlinks=1
仅当在可全局写入的粘性目录之外,当符号链接和关注者的所有者匹配或目录所有者与符号链接的所有者匹配时,才允许遵循符号链接。这还可以防止没有对源文件的读/写访问权限的用户创建硬链接。这两者都阻止了许多常见的TOCTOU漏洞(time-of-check-to-time-of-use)
fs.protected_fifos=2 fs.protected_regular=2
这些阻止了在可能由攻击者控制的环境(例如,全局可写目录)中创建文件,从而使数据欺骗攻击更加困难。
引导参数
引导参数在引导时使用引导加载程序(bootloader)将设置传递给内核。类似于sysctl,可以使用某些设置来提高安全性。引导加载程序通常在引导参数设置方式上有所不同。下面列出了一些示例,但是您应该研究特定bootloader的修改参数的必要步骤。
如果使用GRUB作为引导程序,请编辑/etc /default/grub并将参数添加到GRUB_CMDLINE_LINUX_DEFAULT=line。
如果使用Syslinux,请编辑/boot/syslinux/syslinux.cfg并将它们添加到APPEND行中。
如果使用systemd-boot,请编辑您的加载程序条目,并将其附加到linux行的末尾。
建议使用以下设置以提高安全性。
Kernel self-protection
slab_nomerge
这将禁用slab合并,这将通过防止覆盖合并的缓存中的对象并使其更难以影响slab缓存的布局,从而大大增加了堆利用的难度。
slub_debug=FZ
这些启用健全性检查(F)和重新分区(Z)。健全性检查会添加各种检查,以防止某些slab操作中的损坏。重新分区会在slab周围添加额外的区域,以检测slab何时被覆盖超过其实际大小,从而有助于检测溢出。
init_on_alloc=1 init_on_free=1
这样可以在分配和空闲时间期间将内存清零,这可以帮助减轻使用后使用的漏洞并清除内存中的敏感信息。如果您的内核版本低于5.3,则这些选项不存在。而是在上述slub_debug选项后面附加“ P”,以获得slub_debug=FZP并添加page_poison=1。由于它们实际上是一种调试功能,刚好具有一些安全性,因此它们在释放时提供的内存擦除形式较弱。
page_alloc.shuffle=1
此选项使页分配器空闲列表随机化,从而通过降低页分配的可预测性来提高安全性,同时这也提高了性能。
pti=on
这将启用内核页表隔离,从而减轻崩溃并防止某些KASLR绕过。
vsyscall=none
这将禁用vsyscall,因为它们已过时且已被vDSO取代。 vsyscall也在内存中的固定地址上,使其成为ROP攻击的潜在目标。
debugfs=off
这将禁用debugfs,它会公开许多有关内核的敏感信息。
oops=panic
有时某些内核漏洞利用会导致所谓的“oops”。此参数将引发内核对此类事件panic,从而防止这些攻��。但是,有时错误的驱动程序会导致无害的操作,这会导致系统崩溃,这意味着此引导参数只能在某些硬件上使用。
module.sig_enforce=1
这仅允许加载已使用有效密钥签名的内核模块,使加载恶意内核模块更加困难。
这可以防止加载所有树外内核模块(包括DKMS模块),除非您已对其进行签名,这意味着诸如VirtualBox或Nvidia驱动程序之类的模块可能不可用,但根据您的设置可能并不重要。
lockdown=confidentiality
内核锁定LSM可以消除用户空间代码滥用以升级为内核特权并提取敏感信息的许多方法。为了在用户空间和内核之间实现清晰的安全边界,此LSM是必需的。上面的选项在confidentiality模式(最严格的选项)中启用此功能。这意味着module.sig_enforce=1。
mce=0
这将导致内核对ECC内存中无法利用的错误panic,而这些错误可能会被利用。对于没有ECC内存的系统,这是不必要的。
quiet loglevel=0
这些参数可防止引导期间信息泄漏,并且必须与上面的kernel.printk sysctl结合使用。
CPU缓解
最好启用适用于您的CPU的所有CPU缓解措施,以确保您不受已知漏洞的影响。这是启用所有内置缓解措施的列表:
spectre_v2=on spec_store_bypass_disable=on tsx=off tsx_async_abort=full,nosmt mds=full,nosmt l1tf=full,force nosmt=force kvm.nx_huge_pages=force
您必须研究系统受其影响的CPU漏洞,并相应地选择上述缓解措施。请记住,您将需要安装微代码更新,以完全免受这些漏洞的影响。但所有这些操作都可能导致性能显着下降。
结果
如果遵循了以上所有建议(不包括特定的CPU缓解措施),则将具有:
slab_nomerge slub_debug=FZ init_on_alloc=1 init_on_free=1 page_alloc.shuffle=1 pti=on vsyscall=none debugfs=off oops=panic module.sig_enforce=1 lockdown=confidentiality mce=0 quiet loglevel=0
如果将GRUB用作引导加载程序,则可能需要重新生成GRUB配置文件才能应用这些文件。
hidepid
proc是一个伪文件系统,其中包含有关系统上当前正在运行的所有进程的信息。默认情况下,所有用户都可以访问此程序,这可能使攻击者可以窥探其他进程。要只允许用户看到自己的进程,而不能看到其他用户的进程,则必须使用hidepid=2,gid=proc挂载选项来挂载/proc。gid=proc将proc组从此功能中排除,因此您可以将特定的用户或进程列入白名单。添加这些选项的一种方法是编辑/etc/fstab并添加:
proc /proc proc nosuid,nodev,noexec,hidepid=2,gid=proc 0 0
systemd-logind仍然需要查看其他用户的进程,因此,要使用户会话在systemd系统上正常工作,必须创建/etc/systemd/system/systemd-logind.service.d/hidepid.conf并添加:
[Service] SupplementaryGroups=proc
减少内核攻击面
最好禁用不是绝对必要的任何功能,以最大程度地减少潜在的内核攻击面。这些功能不必一定很危险,它们可以只是被删除以减少攻击面的良性代码。切勿禁用您不了解的随机事物。以下是一些可能有用的示例,具体取决于您的设置。
引导参数
引导参数通常可以用来减少攻击面,这样的例子之一是:
ipv6.disable=1
这将禁用整个IPv6堆栈,如果您尚未迁移到该堆栈,则可能不需要该堆栈。如果正在使用的IPv6,请不要使用此引导参数。
将内核模块列入黑名单
内核允许非特权的用户通过模块自动加载来间接导致某些模块被加载。这使攻击者可以自动加载易受攻击的模块,然后加以利用。一个这样的示例是CVE-2017-6074,其中攻击者可以通过启动DCCP连接来触发DCCP内核模块的加载,然后利用该内核模块中的漏洞。
可以通过将文件插入/etc/modprobe.d并将指定的内核模块列入黑名单的方法,将特定的内核模块列入黑名单。
Install参数告诉modprobe运行特定命令,而不是像往常一样加载模块。 /bin/false是仅返回1的命令,该命令实际上不会执行任何操作。两者都告诉内核运行/bin/false 而不是加载模块,这将防止攻击者利用该模块。以下是最有可能不需要的内核模块:
install dccp /bin/false install sctp /bin/false install rds /bin/false install tipc /bin/false install n-hdlc /bin/false install ax25 /bin/false install netrom /bin/false install x25 /bin/false install rose /bin/false install decnet /bin/false install econet /bin/false install af_802154 /bin/false install ipx /bin/false install appletalk /bin/false install psnap /bin/false install p8023 /bin/false install p8022 /bin/false install can /bin/false install atm /bin/false
特别是模糊的网络协议会增加大量的远程攻击面。此黑名单:
DCCP — Datagram Congestion Control Protocol
SCTP — Stream Control Transmission Protocol
RDS — Reliable Datagram Sockets
TIPC — Transparent Inter-process Communication
HDLC — High-Level Data Link Control
AX25 — Amateur X.25
NetRom
X25
ROSE
DECnet
Econet
af_802154 — IEEE 802.15.4
IPX — Internetwork Packet Exchange
AppleTalk
PSNAP — Subnetwork Access Protocol
p8023 — Novell raw IEEE 802.3
p8022 — IEEE 802.2
CAN — Controller Area Network
ATM
install cramfs /bin/false install freevxfs /bin/false install jffs2 /bin/false install hfs /bin/false install hfsplus /bin/false install squashfs /bin/false install udf /bin/false
将各种稀有文件系统列入黑名单。
install cifs /bin/true install nfs /bin/true install nfsv3 /bin/true install nfsv4 /bin/true install gfs2 /bin/true
如果不使用网络文件系统,也可以将其列入黑名单。
install vivid /bin/false
vivid driver驱动程序仅用于测试目的,并且是特权提升漏洞的原因,因此应禁用它。
install bluetooth /bin/false install btusb /bin/false
禁用具有安全问题历史记录的蓝牙。
install uvcvideo /bin/false
这会禁用网络摄像头,以防止其被用来监视您。
您也可以将麦克风模块列入黑名单,但这在系统之间可能会有所不同。要查找模块的名称,请在/proc/asound/modules中查找并将其列入黑名单。例如,一个这样的模块是snd_hda_intel。
请注意,尽管有时麦克风的内核模块与扬声器的模块相同。这意味着像这样禁用麦克风也可能会无意中禁用任何扬声器,虽然扬声器也有可能变成麦克风,所以这不一定是消极的结果。
最好从物理上删除这些设备,或者至少在BIOS/UEFI中禁用它们。禁用内核模块并不总是那么有效。
rfkill
可以通过rfkill将无线设备列入黑名单,以进一步减少远程攻击面。要将所有无线设备列入黑名单,请执行:
rfkill block all
WiFi可以通过以下方式解锁:
rfkill unblock wifi
在使用systemd的系统上,rfkill在所有会话中均保持不变,但是,在使用其他init系统的系统上,您可能必须创建一个init脚本以在引导时执行这些命令。
其他内核指针泄漏
前面的部分已经防止了一些内核指针泄漏,但是还有更多泄漏。
在文件系统上,/boot中存在内核映像和System.map文件。/usr/src和/{,usr/} lib/modules目录中还有其他敏感的内核信息。您应该限制这些目录的文件权限,以使它们只能由root用户读取。您还应该删除System.map文件,因为除高级调试外,它们都不需要。
此外,某些日志记录守护程序(例如systemd的journalctl)包括内核日志,可用于绕过上述dmesg_restrict保护。从adm组中删除用户通常足以撤销对以下日志的访问:
gpasswd -d $user adm
限制对sysfs的访问
sysfs是伪文件系统,可提供大量的内核和硬件信息。它通常安装在/sys上。 sysfs导致大量信息泄漏,尤其是内核指针泄漏。Whonix的security-misc软件包包括hide-hardware-info脚本,该脚本限制访问此目录以及/proc中的一些脚本,以试图隐藏潜在的硬件标识符并防止内核指针泄漏。该脚本是可配置的,并允许基于组将特定的应用程序列入白名单。建议应用此方法,并使其在启动时使用init脚本执行。或者这样做成systemd服务。
为了使基本功能在使用systemd的系统上运行,必须将一些系统服务列入白名单。这可以通过创建/etc/systemd/system/[email protected]/sysfs.conf并添加以下内容来完成:
[Service] SupplementaryGroups=sysfs
但是,这不能解决所有问题。许多应用程序可能仍会中断,您需要将它们正确列入白名单。
Linux强化
某些发行版(例如Arch Linux)包括强化的内核程序包。它包含许多强化补丁程序和更注重安全性的内核配置。如果可能的话,建议安装它。
Grsecurity
Grsecurity是一组内核修补程序,可以大大提高内核安全性。这些补丁曾经可以免费获得,但是现在需要购买了。如果可用,则强烈建议您获取它。Grsecurity提供了最新的内核和用户空间保护。
内核运行时防护
Linux Kernel Runtime Guard(LKRG)是一个内核模块,可确保运行时内核的完整性并检测漏洞。它可以杀死整个类别的内核漏洞。但这并不是一个完美的缓解方法,因为LKRG在设计上可以绕开。它仅适用于现成的恶意软件。但是,尽管可能性不大,但LKRG本身可能会像其他任何内核模块一样公开新的漏洞。
自编译内核
建议编译您自己的内核,同时启用尽可能少的内核模块和尽可能多的安全性功能,以将内核的受攻击面保持在绝对最低限度。
另外,应用内核强化补丁,例如如上所述的linux-hardened或grsecurity。
发行版编译的内核还具有公共内核指针/符号,这对于漏洞利用非常有用。编译自己的内核将为您提供独特的内核符号,连同kptr_restrict,dmesg_restrict和其他针对内核指针泄漏的强化措施,将使攻击者更加难以创建依赖于内核指针知识的漏洞利用程序。
您就可以从Whonix的强化内核中汲取灵感或使用它。
强制访问措施
强制访问控制(MAC)系统对程序可以访问的内容进行细粒度的控制。这意味着您的浏览器将无权访问您的整个主目录或类似目录。
最常用的MAC措施是SELinux和AppArmor。SELinux比AppArmor更安全,因为它的粒度更细。例如,它是基于inode而不是基于路径的,允许强制执行明显更严格的限制,可以过滤内核ioctl等。不幸的是,这是以难以使用和难以学习为代价的,因此某些人可能会首选AppArmor。
要在内核中启用AppArmor,必须设置以下引导参数:
apparmor=1 security=apparmor
要启用SELinux,请设置以下参数:
selinux=1 security=selinux
请记住,仅启用MAC措施本身���不能神奇地提高安全性。您必须制定严格的政策才能充分利用它。例如,要创建AppArmor配置文件,请执行:
aa-genprof $path_to_program
打开程序,然后像往常一样开始使用它。AppArmor将检测需要访问哪些文件,并将它们添加到配置文件中(如果您选择的话)。但是,仅凭这一点不足以提供高质量的配置文件。请参阅AppArmor文档以获取更多详细信息。
如果您想更进一步,则可以通过实施initramfs勾子来设置一个完整的系统MAC策略,该策略限制每个单个用户空间进程,该挂钩对init系统强制实施MAC策略。这就是Android使用SELinux的方式,以及Whonix未来将如何使用AppArmor的方式。对于加强实施最小特权原则的强大安全模型是必要的。
沙箱
应用沙箱
沙箱可让您在隔离的环境中运行程序,该环境对系统的其余部分具有有限的访问权限或完全没有访问权限。您可以使用它们来保护应用程序安全或运行不受信任的程序。
建议与AppArmor或SELinux一起在单独的用户帐户中使用Bubblewrap到沙箱程序。您也可以考虑改用gVisor,它的优点是为每个来宾提供了自己的内核。
这些方法中的任何一个都可以用来��建一个功能强大的沙箱,并且暴露的攻击面最小。如果您不想自己创建沙箱,请在完成后考虑使用Whonix的sandbox-app-launcher。您不应该使用Firejail。
诸如Docker和LXC之类的容器解决方案经常被误导为沙盒形式。它们太宽松了,无法广泛支持各种应用程序,因此不能认为它们是强大的应用程序沙箱。
常见沙箱逃逸
PulseAudio
PulseAudio是一种常见的声音服务器,但在编写时并未考虑隔离或沙盒的问题,这使其成为重复出现的沙盒逃逸漏洞。为了防止这种情况,建议您从沙箱中阻止对PulseAudio的访问,或者从系统中完全卸载它。
D-Bus
D-Bus是台式机Linux上最流行的进程间通信形式,但它也是沙箱逃逸的另一种常见途径,因为它允许与服务自由交互。这些漏洞的一个例子就是Firejail。您应该从沙箱中阻止对D-Bus的访问,或者通过MAC以细粒度的规则进行调解。
GUI隔离
任何Xorg窗口都可以访问另一个窗口。这允许琐碎的键盘记录或屏幕截图程序,甚至可以记录诸如root密码之类的内容。您可以使用嵌套的X11服务器(例如Xpra或Xephyr和bubblewrap)将Xorg窗口沙箱化。默认情况下,Wayland将窗口彼此隔离,这将是一个比Xorg更好的选择,尽管Wayland可能不如Xorg普遍可用,因为它在开发中较早。
ptrace
如前所述,ptrace是一个系统调用,可能会被滥用破坏在沙箱外部运行的进程。为避免这种情况,您可以通过sysctl启用内核YAMA ptrace限制,也可以在seccomp过滤器中将ptrace syscall列入黑名单。
TIOCSTI
TIOCSTI是一个ioctl,它允许注入终端命令,并为攻击者提供了一种简单的机制,可以在同一用户会话内的其他进程之间横向移动。可以通过将seccomp过滤器中的ioctl列入黑名单或使用bubblewrap的--new-session参数来缓解这种攻击。
Systemd沙箱
虽然不建议使用systemd,但有些系统可能无法切换。这些人至少可以使用沙盒服务,因此他们只能访问所需的内容。这是一个沙箱化systemd服务的示例:
[Service] CapabilityBoundingSet=CAP_NET_BIND_SERVICE ProtectSystem=strict ProtectHome=true ProtectKernelTunables=true ProtectKernelModules=true ProtectControlGroups=true ProtectKernelLogs=true ProtectHostname=true ProtectClock=true ProtectProc=invisible ProcSubset=pid PrivateTmp=true PrivateUsers=yes PrivateDevices=true MemoryDenyWriteExecute=true NoNewPrivileges=true LockPersonality=true RestrictRealtime=true RestrictSUIDSGID=true RestrictAddressFamilies=AF_INET RestrictNamespaces=yes SystemCallFilter=write read openat close brk fstat lseek mmap mprotect munmap rt_sigaction rt_sigprocmask ioctl nanosleep select access execve getuid arch_prctl set_tid_address set_robust_list prlimit64 pread64 getrandom SystemCallArchitectures=native UMask=0077 IPAddressDeny=any AppArmorProfile=/etc/apparmor.d/usr.bin.example
所有选项的说明:
CapabilityBoundingSet= — Specifies the capabilities the process is given.
ProtectHome=true — Makes all home directories inaccessible.
ProtectKernelTunables=true — Mounts kernel tunables such as those modified through sysctl as read-only.
ProtectKernelModules=true — Denies module loading and unloading.
ProtectControlGroups=true — Mounts all control group hierarchies as read-only.
ProtectKernelLogs=true — Prevents accessing the kernel logs.
ProtectHostname=true — Prevents changes to the system hostname.
ProtectClock — Prevents changes to the system clock.
ProtectProc=invisible — Hides all outside processes.
ProcSubset=pid — Permits access to only the pid subset of /proc.
PrivateTmp=true — Mounts an empty tmpfs over /tmp and /var/tmp, therefore hiding their previous contents.
PrivateUsers=true — Sets up an empty user namespace to hide other user accounts on the system.
PrivateDevices=true — Creates a new /dev mount with minimal devices present.
MemoryDenyWriteExecute=true — Enforces a memory W^X policy.
NoNewPrivileges=true — Prevents escalating privileges.
LockPersonality=true — Locks down the personality() syscall to prevent switching execution domains.
RestrictRealtime=true — Prevents attempts to enable realtime scheduling.
RestrictSUIDSGID=true — Prevents executing setuid or setgid binaries.
RestrictAddressFamilies=AF_INET — Restricts the usable socket address families to IPv4 only (AF_INET).
RestrictNamespaces=true — Prevents creating any new namespaces.
SystemCallFilter=... — Restricts the allowed syscalls to the absolute minimum. If you aren't willing to maintain your own custom seccomp filter, then systemd provides many [predefined system call sets](https://www.freedesktop.org/software/systemd/man/systemd.exec.html#System Call Filtering) that you can use. @system-service will be suitable for many use cases.
SystemCallArchitectures=native — Prevents executing syscalls from other CPU architectures.
UMask=0077 — Sets the umask to a more restrictive value.
IPAddressDeny=any — Blocks all incoming and outgoing traffic to/from any IP address. Set IPAddressAllow= to configure a whitelist. Alternatively, setup a network namespace with PrivateNetwork=true.
AppArmorProfile=... — Runs the process under the specified AppArmor profile.
您不能仅将此示例配置复制到您的配置中,每种服务的要求各不相同,并且必须针对每种服务微调沙箱。要了解有关您可以设置的所有选项的更多信息,请阅读systemd.exec手册页。
如果您使用的系统不是systemd而是init,那么可以使用bubblewrap轻松复制所有这些选项。
gVisor
普通沙箱固有地与主机共享同一内核。您信任我们已经评估为不安全的内核,可以正确限制这些程序。由于主机内核的整个攻击面已完全暴露,因此沙盒中的内核利用程序可以绕过任何限制。已经进行了一些努力来限制使用seccomp的攻击面,但不足以完全解决此问题。
GVisor是解决此问题的方法。它为每个应用程序提供了自己的内核,该内核以内存安全的语言重新实现了Linux内核的大部分系统调用,从而提供了明显更强的隔离性。
虚拟机
虽然不是传统的“沙盒”,但虚拟机通过虚拟化全新系统来分离进程,从而提供了非常强大的隔离性。KVM是内核模块,它允许内核充当管理程序,而QEMU是利用KVM的仿真器。Virt-manager和GNOME Boxs都是良好且易于使用的GUI,用于管理KVM / QEMU虚拟机。不建议使用Virtualbox的原因有很多。
强化内存分配器
hardened_malloc是一种硬化的内存分配器,可为堆内存损坏漏洞提供实质性的保护。它很大程度上基于OpenBSD的malloc设计,但具有许多改进。
可以通过LD_PRELOAD环境变量针对每个应用程序使用hardened_malloc。例如,假设您编译的库位于/usr/lib/libhardened_malloc.so,则可以执行:
LD_PRELOAD="/usr/lib/libhardened_malloc.so" $program
通过全局预加载该库,也可以在系统范围内使用它,这是使用它的推荐方法。为此,请编辑/etc/ld.so.preload并插入:
/usr/lib/libhardened_malloc.so
尽管大多数应用程序都可以正常工作,但hardened_malloc可能会破坏某些应用程序。建议使用以下选项编译hardened_malloc以最大程度地减少损坏:
CONFIG_SLAB_QUARANTINE_RANDOM_LENGTH=0 CONFIG_SLAB_QUARANTINE_QUEUE_LENGTH=0 CONFIG_GUARD_SLABS_INTERVAL=8
您还应该使用sysctl设置以下内容,以适应hardened_malloc创建的大量保护页:
vm.max_map_count=524240
Whonix项目为基于Debian的发行版提供了hardened_malloc软件包。
强化编译标志
编译自己的程序可以带来很多好处,因为它使您能够优化程序的安全性。但是,执行完全相反的操作并降低安全性很容易,如果您不确定自己在做什么,请跳过本节。在基于源的发行版(例如Gentoo)上,这将是最简单的,但也可以在其他发行版上这样做。
某些编译选项可用于添加其他漏洞利用缓解措施,从而消除整个类别的常见漏洞。您可能听说过常规保护,例如位置独立可执行文件,堆栈粉碎保护程序,立即绑定,只读重定位和FORTIFY_SOURCE,但是本节将不做介绍,因为它们已被广泛采用。相反,它将讨论诸如控制流完整性和影子堆栈之类的现代漏洞利用缓解措施。
本节涉及主要用C或C ++编写的本机程序。您必须使用Clang编译器,因为这些功能在GCC上不可用。请记住,由于未广泛采用这些缓解措施,因此某些应用程序在启用它们后可能无法运行。
控制流完整性(CFI)是一种缓解漏洞利用的方法,旨在防止诸如ROP或JOP之类的代码重用攻击。由于更广泛采用的缓解措施(例如NX)使过时的利用技术过时了,因此使用这些技术利用了很大一部分漏洞。Clang支持细粒度的前沿CFI,这意味着它可以有效缓解JOP攻击。Clang的CFI本身并不能减轻ROP;您还必须使用下面记录的单独机制。要启用此功能,必须应用以下编译标志: -flto -fvisibility=hidden -fsanitize=cfi
影子堆栈通过将程序复制到其他隐藏堆栈中来保护程序的返回地址。然后比较主堆栈和影子堆栈中的返回地址,看两者是否不同。如果是这样,则表明存在攻击,程序将中止,从而减轻了ROP攻击。Clang具有称为ShadowCallStack的功能,可以完成此操作,但是,仅在ARM64上可用。要启用此功能,必须应用以下编译标志: -fsanitize=shadow-call-stack
如果上述ShadowCallStack不是一个选项,则可以选择使用具有相似目标的SafeStack。但是,不幸的是,此功能有许多漏洞,因此效果不甚理想。如果仍然希望启用此功能,则必须应用以下编译标志: -fsanitize=safe-stack
最常见的内存损坏漏洞之一是未初始化的内存。Clang有一个选项可以使用零或特定模式自动初始化变量。建议将变量初始化为零,因为使用其他模式比利用漏洞缓解功能更适合发现错误。要启用此功能,必须应用以下编译标志: -ftrivial-auto-var-init=zero -enable-trivial-auto-var-init-zero-knowing-it-will-be-removed-from-clang 但该选项的存在目前正在辩论中。
内存安全语言
用内存安全语言编写的程序会自动受到保护,免受各种安全漏洞的影响,这些安全漏洞包括缓冲区溢出,未初始化的变量,售后使用等。Microsoft和Google的安全研究人员进行的研究证明,已发现的大多数漏洞都是内存安全问题。这样的内存安全语言的示例包括Rust,Swift和Java,而内存不安全语言的示例包括C和C ++。如果可行,应使用内存安全替代品替换尽可能多的程序。
Root账户
root可以执行任何操作,并且可以访问您的整个系统。因此,应尽可能将其锁定,以使攻击者无法轻松获得root用户访问权限。
/etc/securetty
/etc/securetty文件指定允许您以root用户身份登录的位置。该文件应保留为空,以便任何人都不能从终端上这样做。
限制su
su可让您从终端切换用户。默认情况下,它尝试以root用户身份登录。要将su的使用限制在wheel组中,请编辑/etc/pam.d/su和/etc/pam.d/su-l并添加:
auth required pam_wheel.so use_uid
您应该在wheel组中拥有尽可能少的用户。
锁定root账户
要锁定root帐户以防止任何人以root身份登录,请执行:
passwd -l root
在执行此操作之前,请确保您具有获取根的替代方法(例如,从活动USB引导并更改为文件系统的chroot),以免您无意中将自己锁定在系统之外。
拒绝通过SSH的远程root登陆
为了防止某人通过SSH以root身份登录,请编辑/etc/ssh/sshd_config并添加:
PermitRootLogin no
增加散列回合数
您可以增加shadow使用的哈希回合数,从而通过迫使攻击者计算更多的哈希值来破解您的密码,从而提高哈希密码的安全性。默认情况下,shadow使用5000次回合,但是您可以将其增加到任意数量。尽管配置的回合越多,登录速度就越慢。编辑/etc/pam.d/passwd并添加回合选项。
password required pam_unix.so sha512 shadow nullok rounds=65536
这使shadow执行65536次散列回合。
应用此设置后,密码不会自动重新加密,因此您需要使用以下方法重置密码:
passwd $username
限制Xorg root访问
默认情况下,某些发行版以root用户身份运行Xorg,这是一个问题,因为Xorg包含大量古老而又复杂的代码,这增加了巨大的攻击面,并使其更有可能拥有可以获取root特权的漏洞利用程序。要阻止它作为root用户执行,请编辑/etc/X11/Xwrapper.config并添加:
needs_root_rights = no
安全访问root
恶意软件可以使用多种方法来嗅探root帐户的密码。因此,访问根帐户的传统方式是不安全的,最好根本不访问根,但这实际上是不可行的。本节详细介绍了访问根帐户的最安全方法。在安装操作系统后,应立即应用这些说明,以确保该软件不含恶意软件。
您绝对不能使用普通用户帐户访问root,因为root可能已被盗用。您也不能直接登录到根帐户。通过执行以下操作,创建一个单独的“管理员”用户帐户,该帐户仅用于访问root用户,而不能用于访问其他用户:
useradd admin
执行并来设置一个非常强的密码:
passwd admin
仅允许该帐户使用您首选的权限提升机制。例如,如果使用sudo,则通过执行以下命令来添加sudoers异常:
visudo -f /etc/sudoers.d/admin-account
然后输入:
admin ALL=(ALL) ALL
确保没有其他帐户可以访问sudo(或您的首选机制)
现在,要实际登录到该帐户,请先重新启动-例如,这可以防止受损的窗口管理器执行登录欺骗。当提供登录提示时,请通过按键盘上的以下组合键来激活安全注意键:
Alt + SysRq + k
这将杀死当前虚拟控制台上的所有应用程序,从而克服登录欺骗攻击。现在,您可以安全地登录到您的管理员帐户,并使用root用户执行任务。完成后,注销管理员帐户,然后重新登录到非特权用户帐户。
防火墙
防火墙可以控制传入和传出的网络流量,并且可以用来阻止或允许某些类型的流量。除非有特殊原因,否则应始终阻止所有传入流量。建议设置严格的iptables或nftables防火墙。火墙必须针对您的系统进行微调,并且没有一个适合所有防火墙的规则集。建议您熟悉创建防火墙规则。Arch Wiki和手册页都是很好的资源。
这是基本iptables配置的示例,该配置禁止所有传入的网络流量:
*filter :INPUT DROP [0:0] :FORWARD DROP [0:0] :OUTPUT ACCEPT [0:0] :TCP - [0:0] :UDP - [0:0] -A INPUT -m conntrack --ctstate RELATED,ESTABLISHED -j ACCEPT -A INPUT -i lo -j ACCEPT -A INPUT -m conntrack --ctstate INVALID -j DROP -A INPUT -p udp -m conntrack --ctstate NEW -j UDP -A INPUT -p tcp --tcp-flags FIN,SYN,RST,ACK SYN -m conntrack --ctstate NEW -j TCP -A INPUT -p udp -j REJECT --reject-with icmp-port-unreachable -A INPUT -p tcp -j REJECT --reject-with tcp-reset -A INPUT -j REJECT --reject-with icmp-proto-unreachable COMMIT
但是,您不应尝试在实际系统上使用此示例。它仅适用于某些台式机系统。
身份标识
为了保护隐私,最好最大程度地减少可追溯到您的信息量。
主机名和用户名
请勿在主机名或用户名中添加唯一标识的内容。将它们保留为通用名称,例如“host”和“user”,以便它们无法识别您。
Timezones / Locales / Keymaps
如果可能,应将您的时区设置为“ UTC”,将区域设置和键盘映射设置为“ US”。
机器ID
一个独一无二的机器ID被存储在/var/lib/dbus/machine-id (systemd系统是保存在/etc/machine-id)这些应编辑为通用名称,例如Whonix ID
b08dfa6083e7567a1921a715000001fb
MAC地址欺骗
MAC地址是分配给网络接口控制器(NIC)的唯一标识符。每次您连接到网络时(WIFI或以太网)则您的MAC地址已暴露。这使人们可以使用它来跟踪您并在本地网络上唯一地标识您。
但您不应该完全随机化MAC地址。拥有完全随机的MAC地址是显而易见的,并且会对您脱颖而出的行为产生不利影响。
MAC地址的OUI(组织唯一标识符)部分标识芯片组的制造商。对MAC地址的这一部分进行随机化处理可能会为您提供以前从未使用过的OUI,数十年来从未使用过的OUI或在您所在的地区极为罕见的OUI,因此使您脱颖而出,很明显地表明您在欺骗MAC地址。
MAC地址的末尾标识您的特定设备,并且可以用来跟踪您的设备。仅对MAC地址的这一部分进行随机化可防止您被跟踪,同时仍使MAC地址看起来可��。
要欺骗这些地址,请首先执行以下命令找出您的网络接口名称:
ip a
接下来,安装macchanger并执行:
macchanger -e $network_interface
要在每次引导时随机分配MAC地址,您应该为您的特定初始化系统创建一个初始化脚本。这是systemd的一个示例:
[Unit] Description=macchanger on eth0 Wants=network-pre.target Before=network-pre.target BindsTo=sys-subsystem-net-devices-eth0.device After=sys-subsystem-net-devices-eth0.device [Service] ExecStart=/usr/bin/macchanger -e eth0 Type=oneshot [Install] WantedBy=multi-user.target
上面的示例在启动时欺骗了eth0接口的MAC地址。将eth0替换为您的网络接口。
时间攻击
几乎每个系统都有不同的时间。这可用于时钟偏斜指纹攻击,几毫秒的差异足以使用户被暴露识别。
ICMP时间戳
ICMP时间戳会在查询答复中泄漏系统时间。阻止这些攻击的最简单方法是利用防火墙阻止传入连接,或者使内核忽略ICMP请求。
TCP时间戳
TCP时间戳也会泄漏系统时间。内核尝试通过对每个连接使用随机偏移量来解决此问题,但这不足以解决问题。因此应该禁用TCP时间戳,可以通过使用sysctl设置以下内容来完成:
net.ipv4.tcp_timestamps=0
TCP初始化序号
TCP初始序列号(ISN)是泄漏系统时间的另一种方法。为了减轻这种情况,您必须安装tirdad内核模块,该模块会生成用于连接的随机ISN。
时间同步
时间同步对于匿名性和安全性至关重要。错误的系统时钟可能使您遭受时钟偏斜指纹攻击,或者可以用来为您提供过时的HTTPS证书,从而绕过证书到期或吊销。
最流行的时间同步方法NTP是不安全的,因为它未经加密和未经身份验证,因此攻击者可以轻易地拦截和修改请求。NTP还会以NTP时间戳格式泄漏本地系统时间,该格式可用于时钟偏斜指纹识别,如前所述。
因此,您应该卸载所有NTP客户端并禁用systemd-timesyncd(如果正在使用)。您可以通过安全连接(HTTPS或最好是Torion服务)连接到受信任的网站,而不是NTP,并从HTTP标头中提取当前时间。达到此目的的工具是sdwdate或我自己的安全时间同步工具。
按键指纹
可以通过他们在键盘上输入键的方式来对人进行指纹识别。您可以通过键入速度,在两次按键之间的暂停,每次按键被按下和释放的确切时间等方式来唯一地进行指纹识别。可以使用KeyTrac在线进行测试。
Kloak是一种工具,旨在通过混淆按键和释放事件之间的时间间隔来克服这种跟踪方法。当按键被按下时,它会引入随机延迟,然后由应用程序选择。
文件权限
默认情况下,文件的权限是非常宽松的。您应该在整个系统中搜索权限不当的文件和目录,并对其进行限制。例如,在诸如Debian之类的某些发行版中,用户的Home目录是全局可读的。
这可以通过执行以下操作来限制:
chmod 700 /home/$user
另外一些示例是/boot,/usr /src和/ {,usr /} lib/modules 它们包含内核映像,System.map和其他各种文件,所有这些文件都可能泄漏有关内核的敏感信息。
chmod 700 /boot /usr/src /lib/modules /usr/lib/modules
在基于Debian的发行版中,必须使用dpkg-statoverride保留文件许可权。否则,它们将在更新期间被覆盖。
Whonix的SUID Disabler和Permission Hardener会自动应用本节中详细介绍的步骤。
setuid / setgid
Setuid / SUID允许用户使用二进制文件所有者的特权执行二进制文件。这通常用于允许非特权用户使用通常仅为root用户保留的某些功能。因此,许多SUID二进制文件都有特权升级安全漏洞的历史记录。 Setgid / SGID类似,但适用于组而不是用户。要使用setuid或setgid位查找系统上的所有二进制文件,请执行:
find / -type f \( -perm -4000 -o -perm -2000 \)
然后,您应该删除不使用的程序上的所有不必要的setuid / setgid位,或将其替换为功能。要删除setuid位,请执行:
chmod u-s $path_to_program
要删除setgid位,执行:
chmod g-s $path_to_program
要向文件添加功能,请执行:
setcap $capability+ep $path_to_program
或者,要删除不必要的功能,请执行:
setcap -r $path_to_program
umask
umask设置新创建文件的默认文件权限。默认的umask是0022,它不是很安全,因为它为系统上的每个用户提供了对新创建文件的读取访问权限。要使所有者以外的任何人都不可读新文件,请编辑/etc/profile并添加:
umask 0077
核心转储
核心转储包含特定时间(通常是该程序崩溃时)该程序的已记录内存。它们可能包含敏感信息,例如密码和加密密钥,因此必须将其禁用。
禁用它们的方法主要有三种:sysctl,systemd和ulimit
sysctl
通过sysctl设置以下设置:
kernel.core_pattern=|/bin/false
systemd
创建/etc/systemd/coredump.conf.d/disable.conf并添加如下内容:
[Coredump] Storage=none
ulimit
编辑/etc/security/limits.conf并添加如下内容:
* hard core 0
setuid进程
即使在进行了这些设置之后,以提升的特权运行的进程仍可能会转储其内存。
为了防止他们这样做,请通过sysctl设置以下内容:
fs.suid_dumpable=0
Swap
与核心转储类似,交换或分页将部分内存复制到磁盘,其中可能包含敏感信息。应该将内核配置为仅在绝对必要时进行交换,相应的sysctl设置:
vm.swappiness=1
PAM
PAM是用于用户身份验证的框架。这就是您登录时使用的机制。您可以通过要求使用强密码或在失败的登录尝试后强制执行延迟验证来使其更加安全。
要强制使用强密码,可以使用pam_pwquality。它强制执行密码的可配置策略。例如,如果您希望密码至少包含16个字符(最小),与旧密码(difok)至少6个不同的字符,至少3个数字(dcredit),至少2个大写字母(ucredit),至少2个字符小写字母(lcredit)和至少3个其他字符(ocredit),然后编辑/etc/pam.d/passwd并添加:
password required pam_pwquality.so retry=2 minlen=16 difok=6 dcredit=-3 ucredit=-2 lcredit=-2 ocredit=-3 enforce_for_root password required pam_unix.so use_authtok sha512 shadow
要强制执行延迟验证,可以使用pam_faildelay。要在两次失败的登录尝试之间添加至少4秒的延迟以阻止暴力破解尝试,请编辑/etc/pam.d/system-login并添加:
auth optional pam_faildelay.so delay=4000000
4000000 是4秒(以微秒为单位)。
Microcode更新
Microcode更新对于修复关键的CPU漏洞(如Meltdown和Spectre等)至关重要。大多数发行版都将这些发行版包含在其软件仓库中,例如Arch Linux和Debian。
IPv6隐私扩展
IPv6地址是从计算机的MAC地址生成的,从而使您的IPv6地址是唯一的,并直接绑定到计算机。隐私扩展会生成一个随机的IPv6地址,以减轻这种形式的跟踪。请注意,如果您开启了MAC地址欺骗机制或禁用了IPv6,则无需执行这些步骤。
要启用这些功能,请通过sysctl设置以下设置:
net.ipv6.conf.all.use_tempaddr=2 net.ipv6.conf.default.use_tempaddr=2
NetworkManager
要为NetworkManager启用隐私扩展,请编辑/etc/NetworkManager/NetworkManager.conf并添加:
[connection] ipv6.ip6-privacy=2
systemd-networkd
要为systemd-networkd启用隐私扩展,请创建/etc/systemd/network/ipv6-privacy.conf并添加:
[Network] IPv6PrivacyExtensions=kernel
分区和挂载选项
文件系统应分为多个分区,以对其权限进行细粒度控制。可以添加不同的安装选项以限制可以执行的操作:
nodev - 禁止使用设备
nosuid - 禁止setuid或setgid位
noexec - 禁止执行任何二进制文件
这些安装选项应在/etc/fstab中尽可能设置。如果您不能使用单独的分区,请创建绑定挂载。一个更安全的/etc/fstab的示例:
/ / ext4 defaults 1 1 /home /home ext4 defaults,nosuid,noexec,nodev 1 2 /tmp /tmp ext4 defaults,bind,nosuid,noexec,nodev 1 2 /var /var ext4 defaults,bind,nosuid 1 2 /boot /boot ext4 defaults,nosuid,noexec,nodev 1 2
请注意,可以通过shell脚本绕过noexec。
熵
熵基本上反应操作系统信息收集的随机程度,对于诸如加密之类的事情至关重要。因此,最好通过安装其他随机数生成器(如haveged和jitterentropy)从各种来源收集尽可能多的熵。
为了使jitterentropy正确运行,必须通过创建/usr/lib/modules-load.d/jitterentropy.conf并添加以下内容尽早加载内核模块:
jitterentropy_rng
RDRAND
RDRAN是提供随机数的CPU指令。如果可用,内核会自动将其用作熵源。但是由于它是专有的并且是CPU本身的一部分,因此无法审核和验证其安全性。您甚至无法对代码进行反向工程。该RNG以前曾遭受过漏洞的攻击,其中有些可能是后门攻击。通过设置以下引导参数可以不信任此功能:
random.trust_cpu=off
以root身份编辑文件
建议不要以root用户身份运行普通的文本编辑器。大多数文本编辑器可以做的不仅仅是简单地编辑文本文件,而且还可以被利用。例如,以root身份打开vi并输入:sh。现在,您具有一个可以访问整个系统的root shell,攻击者可以轻松利用该shell。
解决方案是使用sudoedit。这会将文件复制到一个临时位置,以普通用户身份打开文本编辑器,编辑该临时文件并以root用户身份覆盖原始文件。这样,实际的编辑器就不会以root身份运行。要使用sudoedit,执行:
sudoedit $path_to_file
默认情况下,它使用vi,但是可以通过EDITOR或SUDO_EDITOR环境变量来切换默认编辑器。例如,要使用nano,请执行:
EDITOR=nano sudoedit $path_to_file
可以在/etc/environment中全局设置此环境变量。
特定发行版的安全强化
HTTP包管理器镜像
默认情况下,Linux发行版通常使用HTTP或HTTP和HTTPS镜像的混合来从其软件存储库下载软件包。人们认为这很好,因为程序包管理器会在安装前验证程序包的签名。但是,从历史上看,已经有很多绕过此方法的地方。您应将软件包管理器配置为从HTTPS镜像专门下载以进行深度防御。
APT seccomp-bpf
自软件包管理器Debian Buster以来,APT已支持可选的seccomp-bpf过滤。这限制了允许执行APT的系统调用,这可能严重限制攻击者尝试利用APT中的漏洞时对系统造成危害的能力。要启用此功能,请创建/etc/apt/apt.conf.d/40sandbox并添加:
APT::Sandbox::Seccomp "true";
物理安全
全盘加密可确保对驱动器上的所有数据进行加密,并且不会被物理攻击者读取。大多数发行版都支持在安装过程中启用加密,请确保设置了强密码。您也可以使用dm-crypt手动加密驱动器。
请注意,全盘加密不包括/boot,这样仍然可以修改内核、引导加载程序和其他关键文件。为了完全防止篡改,您还必须实施经过验证的引导。
BIOS / UEFI强化
如果您仍在使用旧版BIOS,则应迁移到UEFI,以利用较新的安全功能。大多数BIOS或UEFI实现都支持设置密码。最好启用它并设置一个非常强壮的密码。虽然这是很弱的保护,因为重置密码很简单。它通常存储在易失性内存中,因此攻击者只需要能够卸下CMOS电池几秒钟,或者他们就可以使用某些主板上的跳线将其重置。
您还应该禁用所有未使用的设备和引导选项,例如USB引导,以减少攻击面。
别忽略BIOS或UEFI的更新,确保将其更新。将其与常规操作系统更新一样重要。
此外,请参阅《NSA的硬件和固件安全指南》
Bootloader密码
引导加载程序会在引导过程的早期执行,并负责加载操作系统。保护它非常重要,否则,它可能会被篡改。例如,本地攻击者可以通过在启动时使用init=/bin/bash作为内核参数来轻松获得root shell,该命令告诉内核执行/bin/bash而不是常规的init系统。您可以通过为引导加载程序设置密码来防止这种情况。仅设置引导程序密码不足以完全保护它。还必须按照以下说明设置经过验证的启动。
Grub
要为GRUB设置密码,请执行:
grub-mkpasswd-pbkdf2
输入您的密码,该密码将生成一个字符串。它将类似于“ grub.pbkdf2.sha512.10000.C4009... “ 。创建/etc/grub.d/40_password并添加:
set superusers="$username" password_pbkdf2 $username $password
用grub-mkpasswd-pbkdf2生成的字符串替换“ $ password”。 “ $ username”将用于被允许使用GRUB命令行,编辑菜单项和执行任何菜单项的超级用户。对于大多数人来说,这只是“root”。
重新生成您的配置文件,GRUB现在将受到密码保护。
要仅限制编辑引导参数并访问GRUB控制台,同时仍然允许您引导,请编辑 /boot/grub/grub.cfg并在 “menuentry '$OSName' ”旁边添加“ --unrestricted”参数。
menuentry 'Arch Linux' --unrestricted
您将需要再次重新生成配置文件以应用此更改。
Syslinux
Syslinux可以设置主密码或菜单密码。引导任何条目都需要主密码,而引导特定条目仅需要菜单密码。
要为Syslinux设置主密码,请编辑/boot/syslinux/syslinux.cfg并添加:
MENU MASTER PASSWD $password
要设置菜单密码,请编辑/boot/syslinux/syslinux.cfg,并在带有您要密码保护的项目的标签内,添加:
MENU PASSWD $password
将“ $password”替换为您要设置的密码。
这些密码可以是纯文本,也可以使用MD5,SHA-1,SHA-256或SHA-512进行散列。建议先使用强哈希算法(例如SHA-256或SHA-512)对密码进行哈希处理,以避免将其存储为明文形式。
systemd-boot
systemd-boot具有防止在引导时编辑内核参数的选项。在loader.conf文件中,添加:
editor no
systemd-boot并不正式支持保护内核参数编辑器的密码,但是您可以使用systemd-boot-password来实现。
验证引导
经过验证的引导通过密码验证来确保引导链和基本系统的完整性。这可用于确保物理攻击者无法修改设备上的软件。
如果没有经过验证的引导,则一旦获得物理访问权限,就可以轻松绕过上述所有预防措施。经过验证的引导不仅像许多人认为的那样是为了物理安全。它还可以用于防止远程恶意软件持久化——如果攻击者设法破坏了整个系统并获得了很高的特权,则经过验证的引导将在重新引导后还原其更改,并确保它们无法持久化。
经过验证的最常见的引导实现是UEFI安全引导,但是它本身并不是一个完整的实现,因为它仅会验证引导加载程序和内核,这意味着可以通过以下方法:
仅UEFI安全启动就没有一成不变的信任根,因此物理攻击者仍然可以刷新设备的固件。为了减轻这种情况,请结合使用UEFI安全启动和Intel Boot Guard或AMD Secure Boot。
远程攻击者(或不使用加密的物理攻击者)可以简单地修改操作系统的任何其他特权部分。例如,如果他们有修改内核的特权,那么他们也可以修改/sbin/init来有效地获得相同的结果。因此,仅验证内核和引导加载程序不会对远程攻击者产生任何影响。为了减轻这种情况,您必须使用dm-verity验证基本操作系统,尽管由于传统Linux发行版的布局,这非常困难且笨拙。
通常,很难在传统Linux上实现可靠的经过验证的引导实现。
USBs
USB设备为物理攻击提供了重要的攻击面。例如BadUSB和Stuxnet是此类攻击的范例。最佳实践是禁止所有新连接的USB且仅将受信任设备列入白名单,USBGuard对此非常有用。
您也可以将nousb用作内核引导参数,以禁用内核中的所有USB支持。可以sysctl设置kernel.deny_new_usb=1
DMA攻击
直接内存访问(DMA)攻击涉及通过插入某些物理设备来完全访问所有系统内存。这可以通过控制设备可访问的内存区域的IOMMU或将特别易受攻击的内核模块列入黑名单来缓解。
要启用IOMMU,请设置以下内核引导参数:
intel_iommu=on amd_iommu=on
您只需要为特定的CPU制造商启用该选项,但同时启用这两个选项就没有问题。
efi=disable_early_pci_dma
通过在非常早的启动过程中禁用所有PCI桥接器上的busmaster位,此选项可修复上述IOMMU中的漏洞。
此外,Thunderbolt和FireWire通常容易受到DMA攻击。要禁用它们,请将这些内核模块列入黑名单:
install firewire-core /bin/false install thunderbolt /bin/false
冷启动攻击
当攻击者在擦除RAM中的数据之前对其进行分析时,就会发生冷启动攻击。使用现代RAM时,冷启动攻击不太实用,因为RAM通常会在几秒钟或几分钟内清除,除非将其放入冷却液(如液氮或冷冻机)中。攻击者必须在几秒钟内将设备中的RAM棒拔出并将其暴露于液氮中,而且确保用户不会注意到。
如果冷启动攻击是威胁模型的一部分,请在关机后保护计算机几分钟,以确保没有人可以访问您的RAM记忆棒。您也可以将RAM棒焊接到主板上,以使其更难以卡住。如果使用笔记本电脑,请取出电池,然后直接用充电电缆供电。关机后请拔出电缆,以确保RAM彻底断电无法访问。
在内核自我保护启动参数部分中,空闲时内存清零选项将用零覆盖内存中的敏感数据。此外,强化的内存分配器可以通过CONFIG_ZERO_ON_FREE配置选项清除用户空间堆内存中的敏感数据。尽管如此,某些数据仍可能保留在内存中。
此外,现代内核还包括复位攻击缓解措施,该命令可命令固件在关机时擦除数据,尽管这需要固件支持。
确保正常关闭计算机,以使上述缓解措施可以开始。
如果以上都不适用您的威胁模型,则可以实施Tails的内存擦除过程,该过程将擦除大部分内存(视频内存除外),并且已被证明是有效的。
最佳实践
一旦对系统进行了尽可能多的加固,就应该遵循良好的隐私和安全性惯例:
禁用或删除不需要的东西以最小化攻击面。
保持更新。配置cron任务或init脚本以每天更新系统。
不要泄漏有关您或您的系统的任何信息,无论它看起来多么渺小。
遵循常规的安全和隐私建议
尽管已经进行了强化,但您必须记住Linux仍然是一个有缺陷的操作系统,没有任何强化可以完全修复它。
其他指南
您应该进行尽可能多的研究,而不要依赖单一的信息来源。最大的安全问题之一就是用户。这些是我认为有价值的其他指南的链接:
Arch Linux Security wiki page
Whonix Documentation
NSA RHEL 5 Hardening Guide (稍有过时,但仍包含有用的信息)
KSPP recommended kernel settings
kconfig-hardened-check
术语
您可能需要重新生成GRUB配置,以应用对引导加载程序所做的某些更改。在不同的发行版之间,执行此操作的步骤有时可能会有所不同。例如,在诸如Arch Linux之类的发行版上,应通过执行以下命令来重新生成配置文件:
grub-mkconfig -o $path_to_grub_config
"$path_to_grub_config" 取决于您如何设置系统。它通常是/boot/grub/grub.cfg或/boot/EFI/grub/grub.cfg,但是在执行此命令之前,请务必确保正确。
另外,在Debian或Ubuntu等发行版上,您应该执行以下命令:
update-grub
能力
在Linux内核中,“ root特权”分为各种不同的能力(capabilities)。这在应用最小特权原则时很有帮助——可以给它们仅授予特定的子集,而不是授予进程总的root特权。例如,如果程序只需要设置系统时间,则只需要CAP_SYS_TIME而不是root所有能力。这会限制可能造成的损害,但是,您仍必须谨慎授予能力,因为无论如何,其中许多能力可能会被滥用以获取完整的root特权。
0 notes
Link
0 notes